SDSU SDS Connect
A convenient, fast and simple way to access SDS's most commonly used services.
Announcement
SDS Connect is moving to a new system beginning July 15, 2025. The platform will continue as SDS Connect, however, the login system and some user features will change. Please review the new access instructions and training materials in the Guides for Students and Guides for Faculty sections at the bottom of this page.
What can students and faculty do with SDS Connect?
SDS Connect is our convenient, fast, and easy-to-use system for accessing Student Disability Services’ most commonly used features. Through SDS Connect, students and faculty can:
Guides for Students
1. Log-In: Click "Sign In" in the Student and Staff block (with the power symbol). 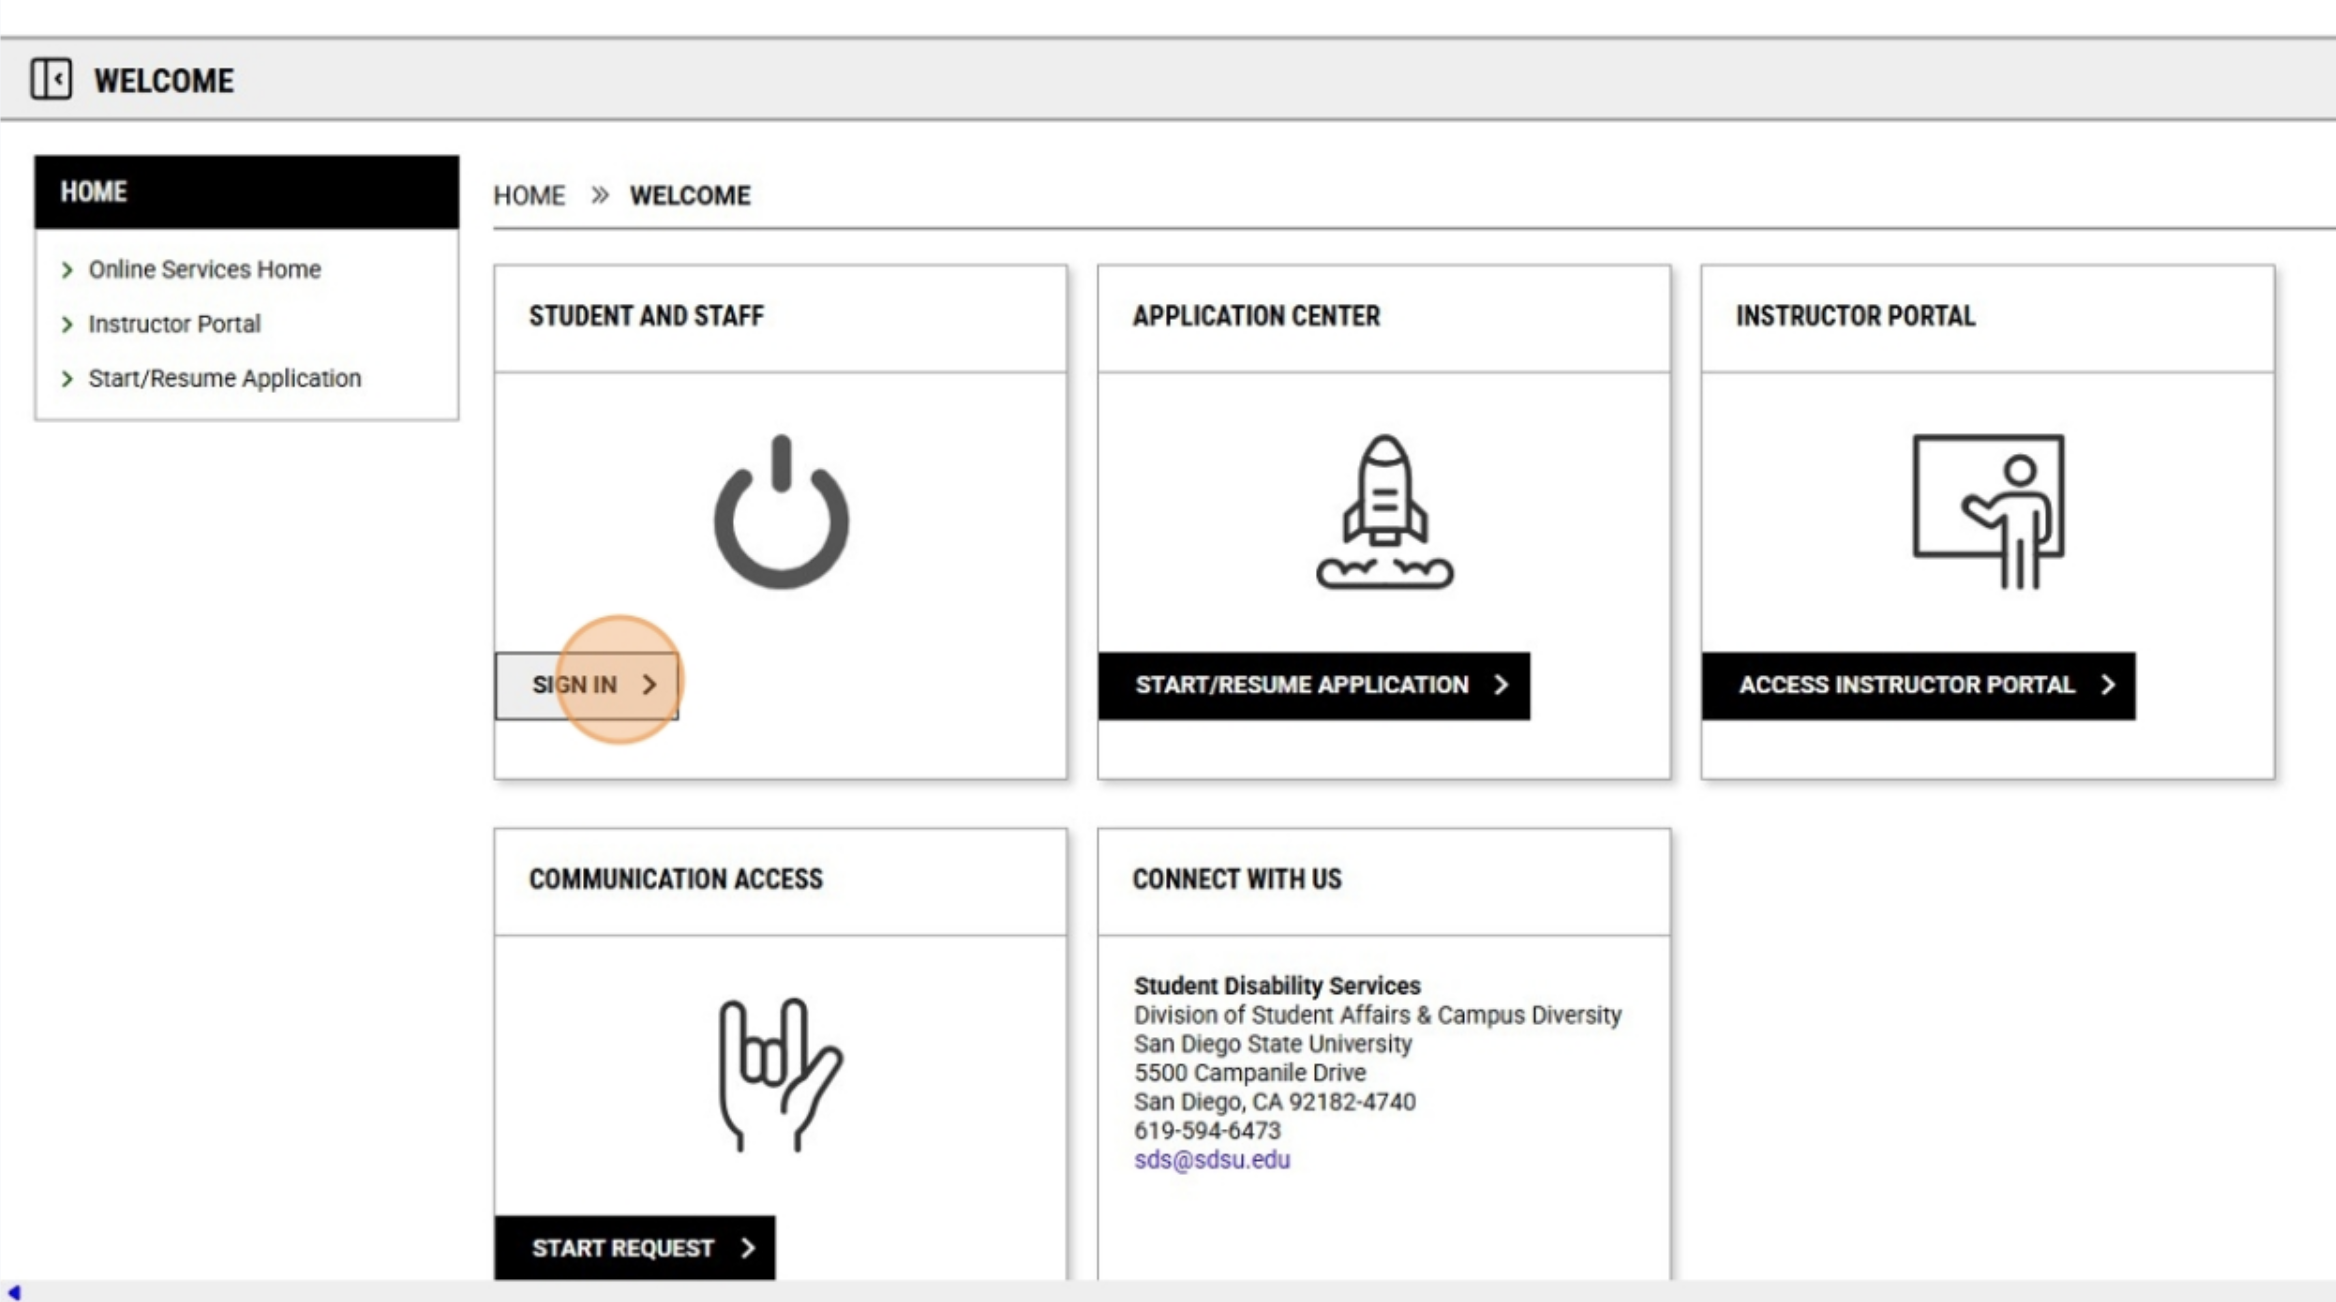
2. Sign in using your SDSU email address and password. 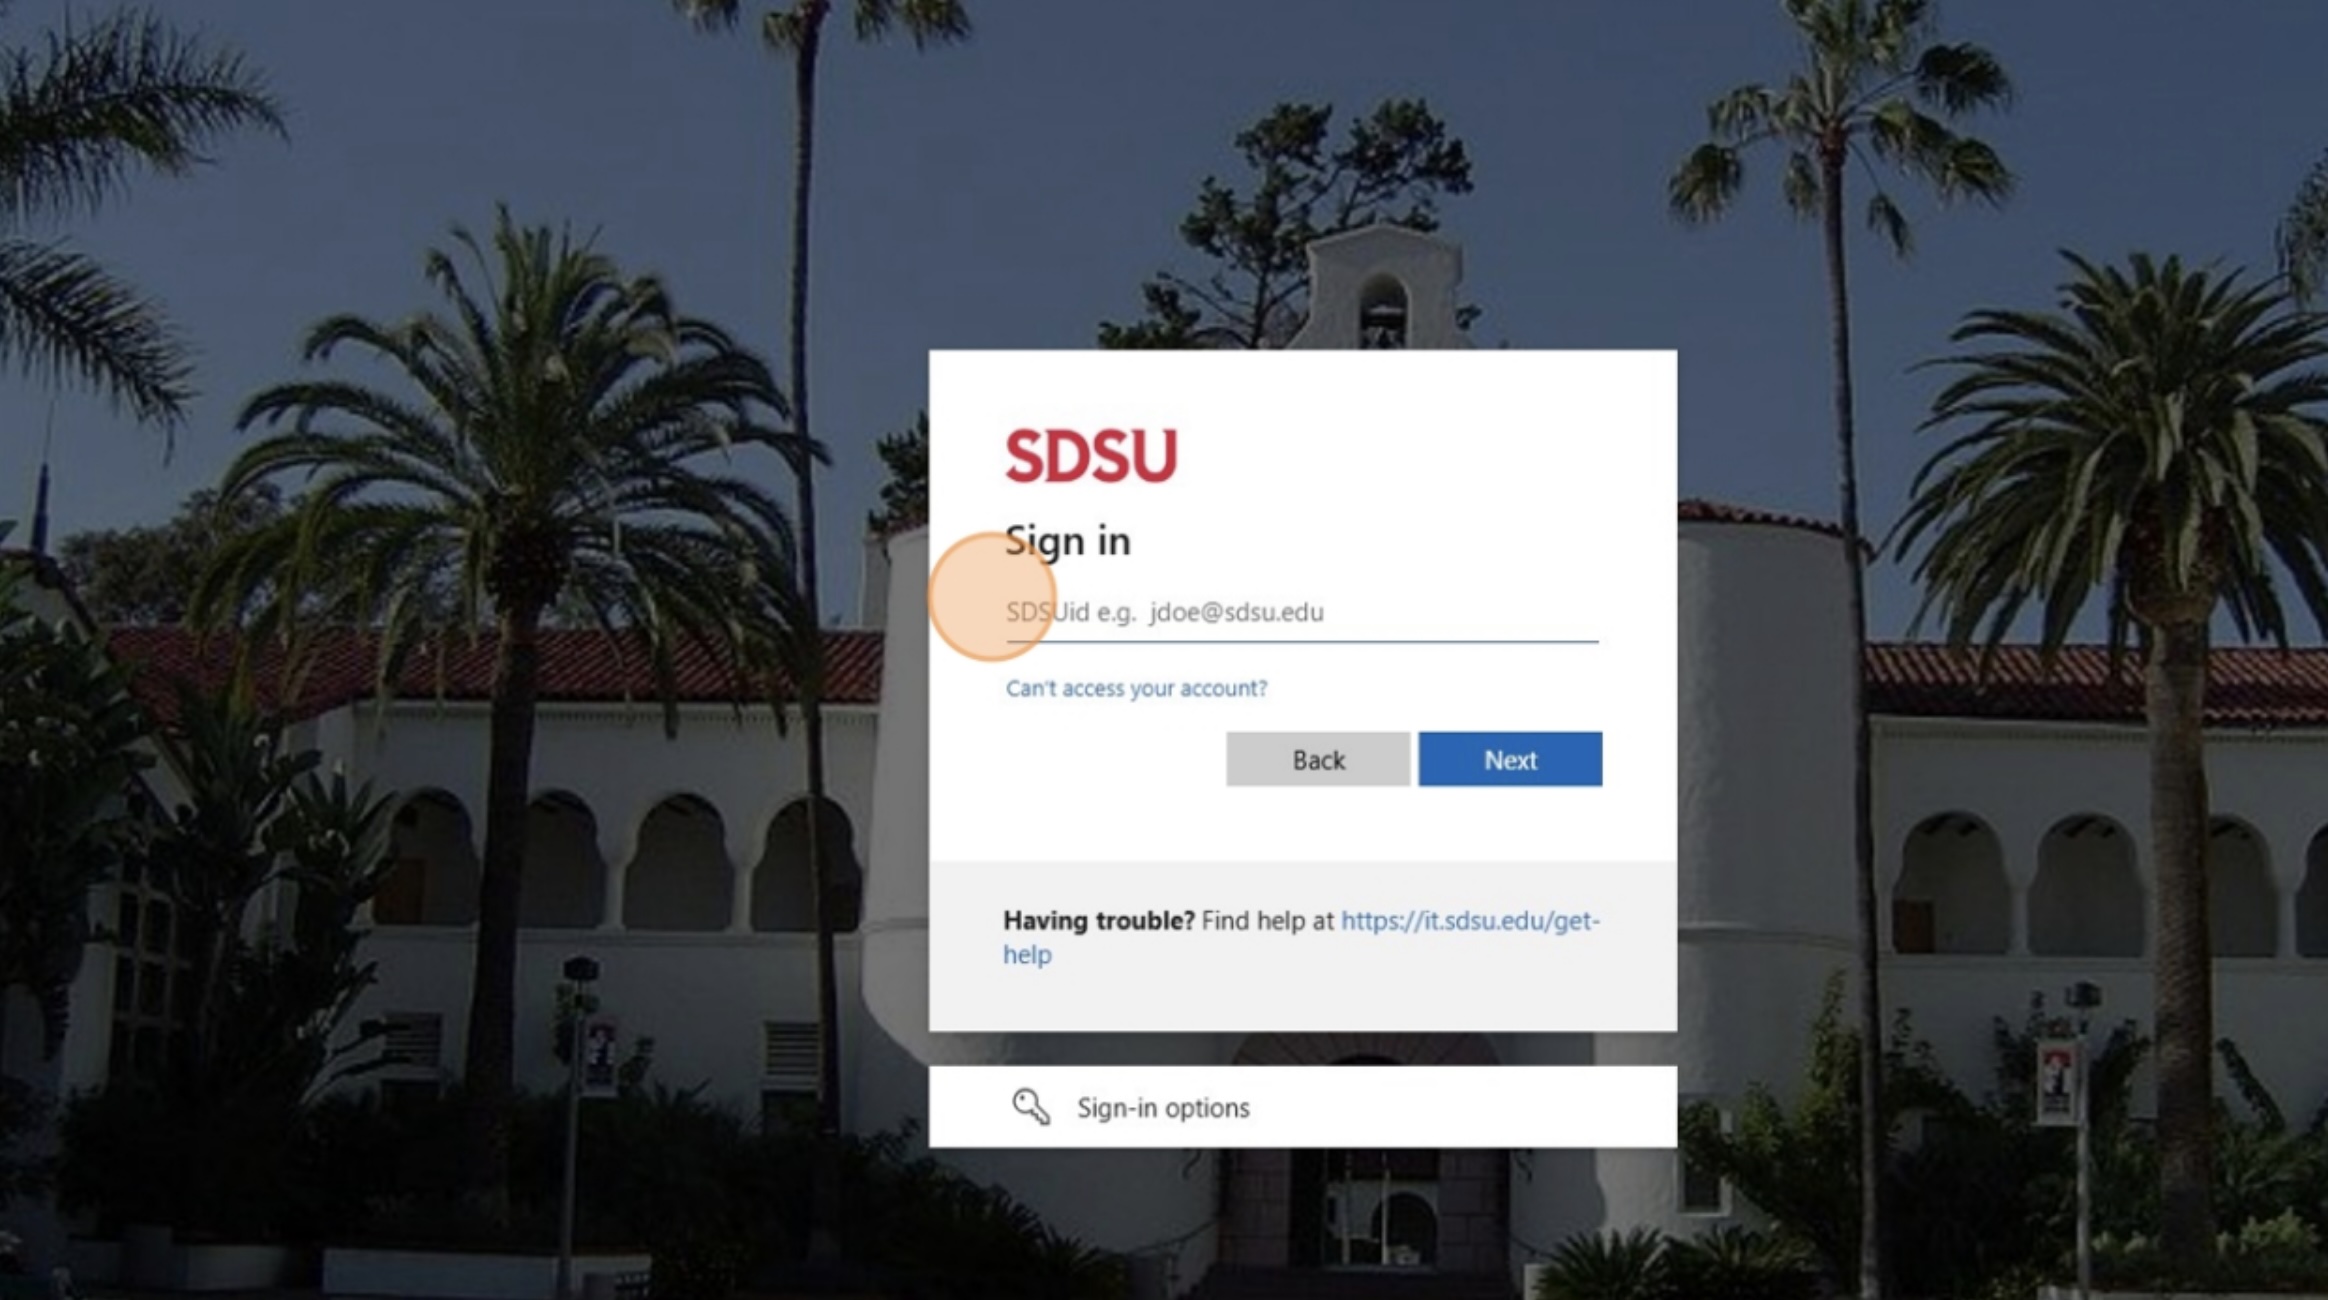
3. First Time Logging-In: The first time you login, there will be a message indicating you have at least one form to electronically sign. Click "Continue to Sign Electronically" to move forward. 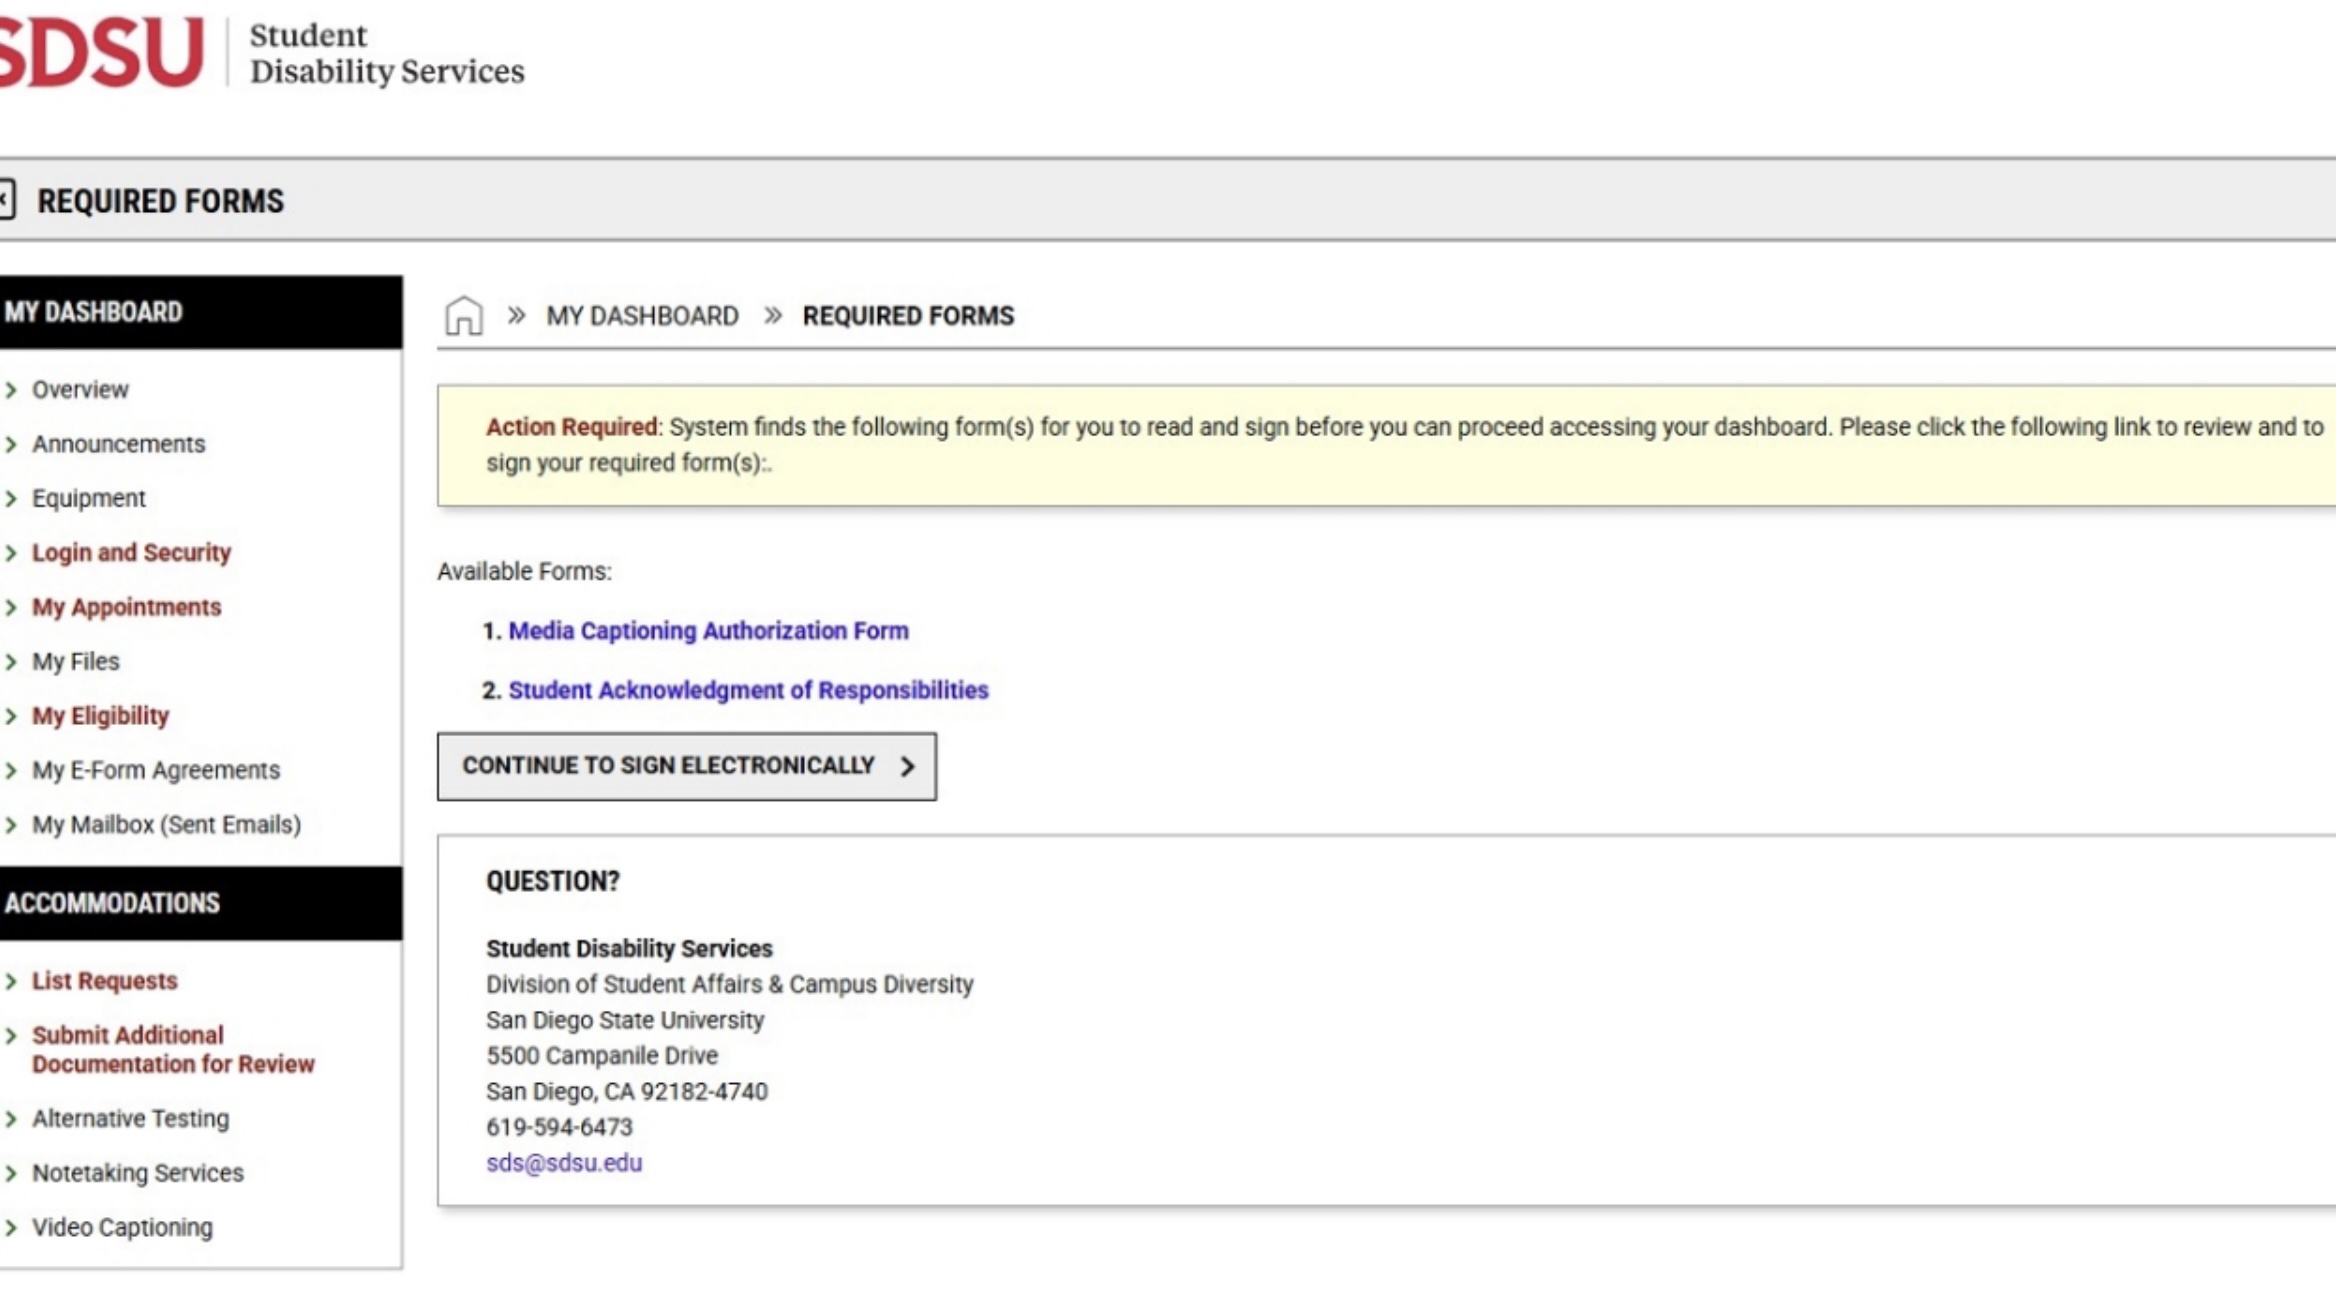
4. Read any form(s) listed and the Student Acknowledgment of Responsibilities completely. At the bottom of the screen, type your name in the "Signature required field" field and click "Submit Form". 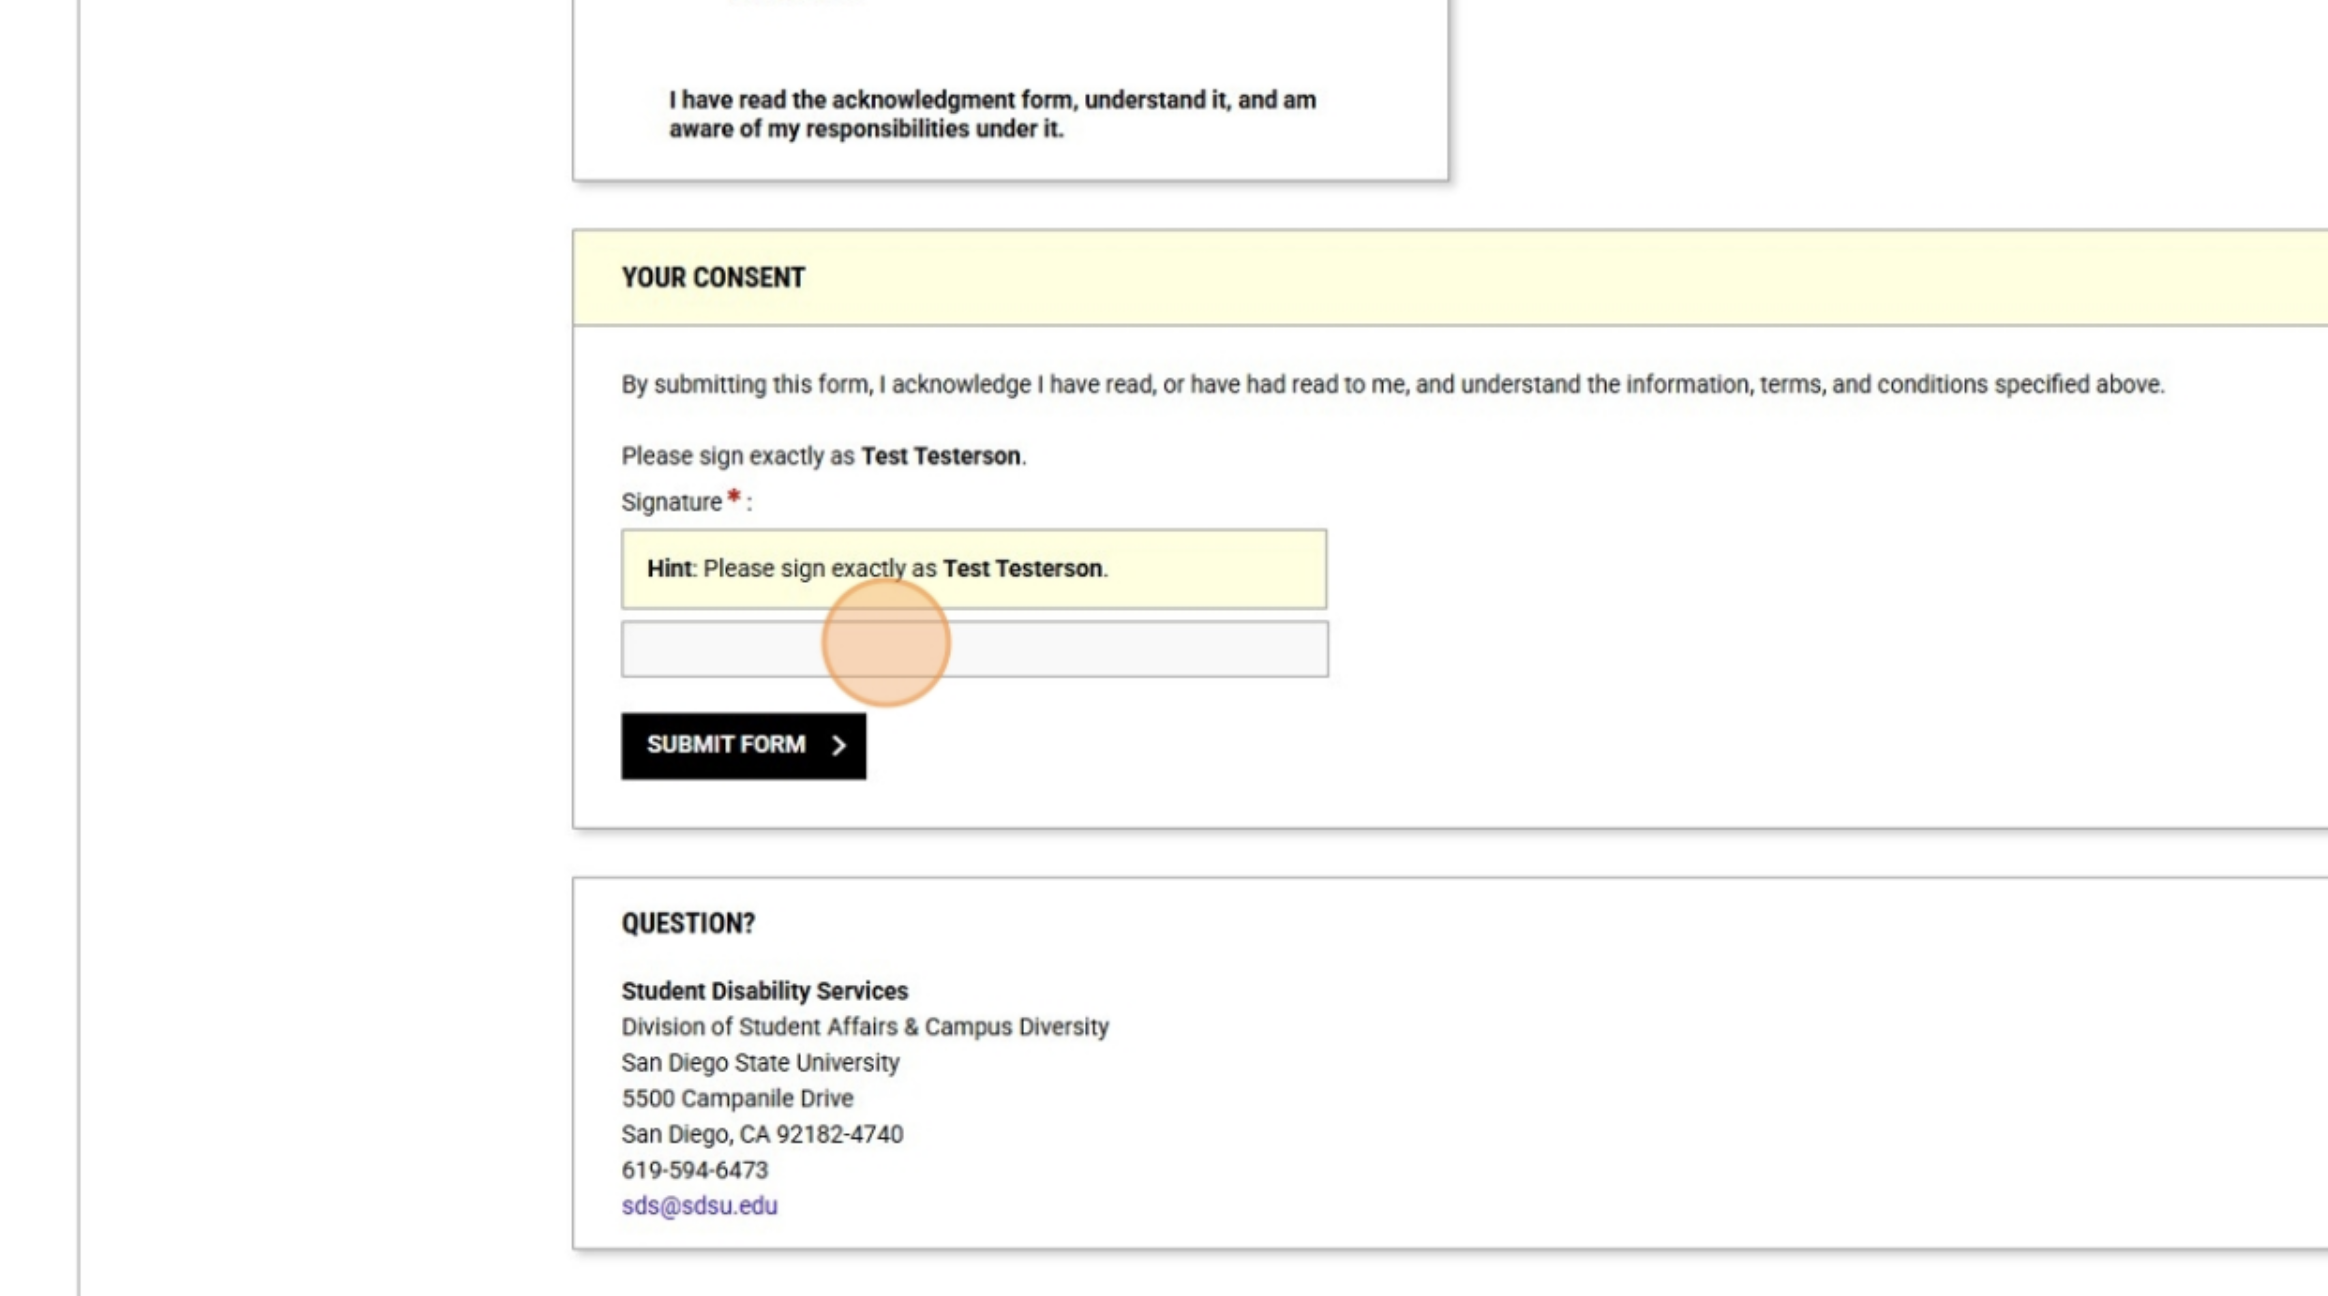
5. You can now move on to scheduling exams.
Follow these steps to send your accommodation letters: Sending your accommodation letters is a process that should be completed every semester for each class that you plan to use your approved accommodations for, as early as possible into the semester. This allows instructors to prepare and adjust for accommodations ahead of time and avoid last-minute complications.
- Navigate to https://loa.accessiblelearning.com/SDSU and log in with your SDSUid username and password.

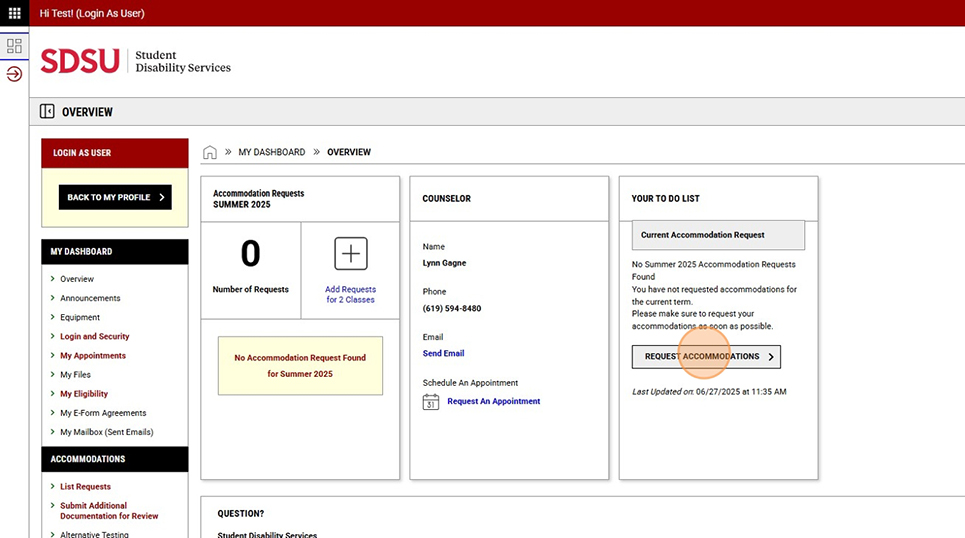
- From your To Do list, click "Request Accommodations".
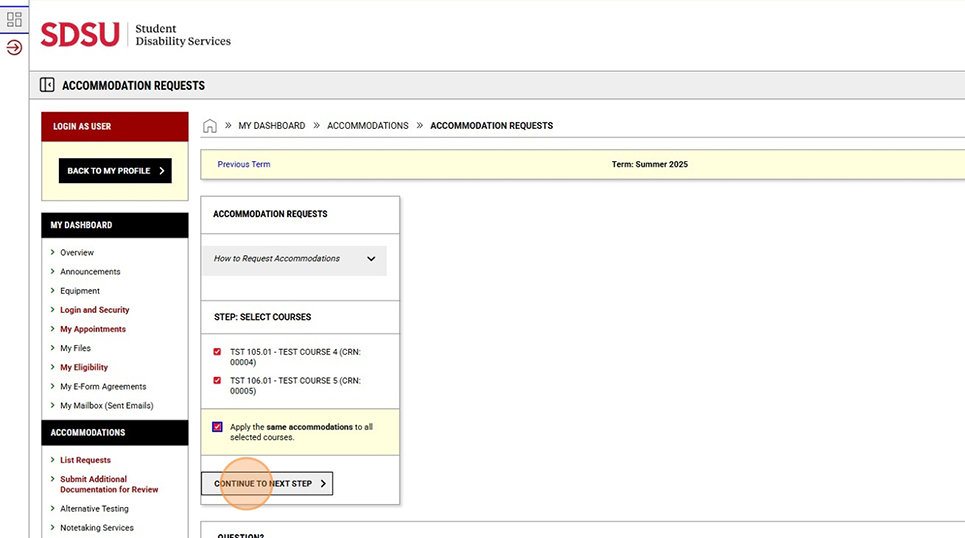
- Select the courses for which you are requesting accommodations. If you will be using the same accommodations for all courses, select "Apply the same accommodations to all selected courses." Click "Continue To Next Step".
- Select the accommodations you will be utilizing for these courses, and click "Submit Request".

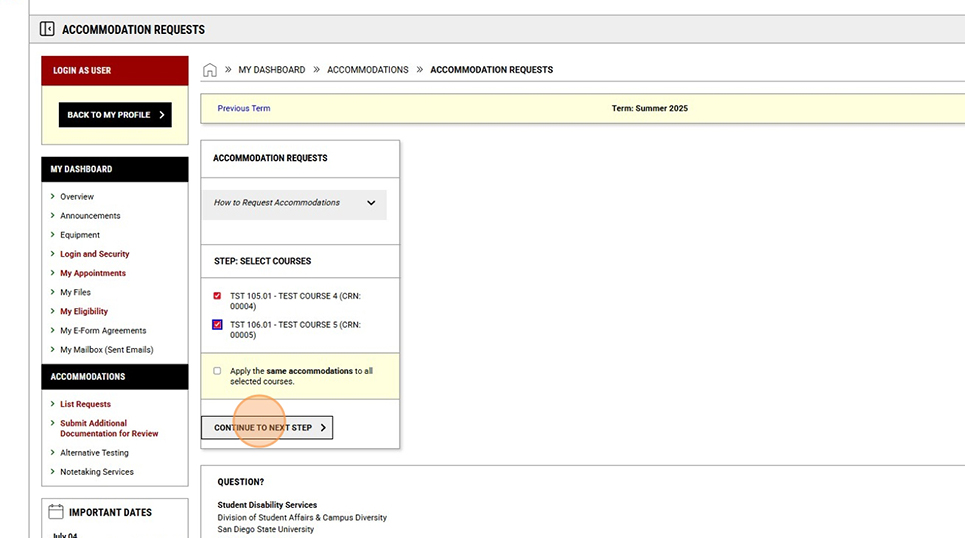
- If you would like to request different accommodations for each course, select the courses, then click "Continue to Next Step".
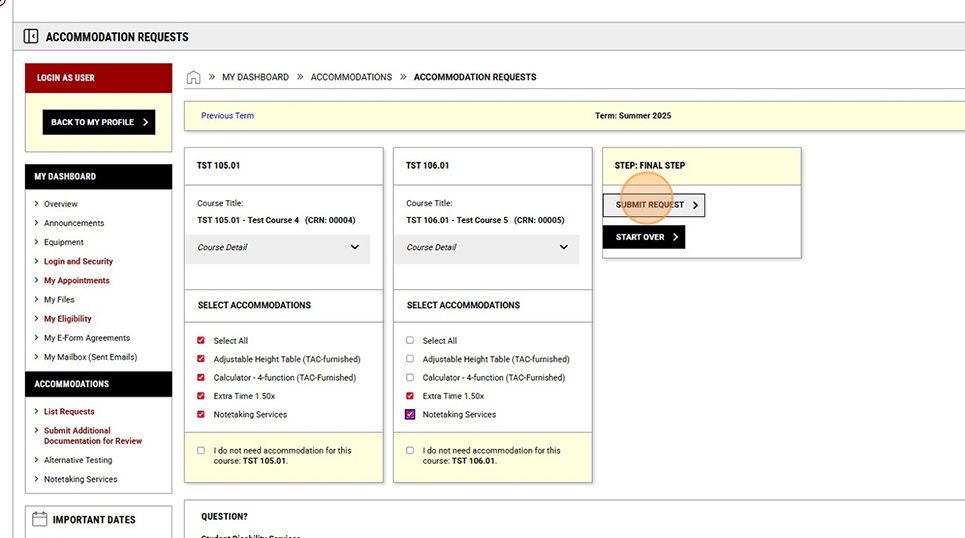
- Select the accommodations you will utilize for each course. When finished, click "Submit Request".
- Your accommodation requests are complete, and you may now download a copy of your accommodation letters for your records (optional) by clicking "Get PDF".
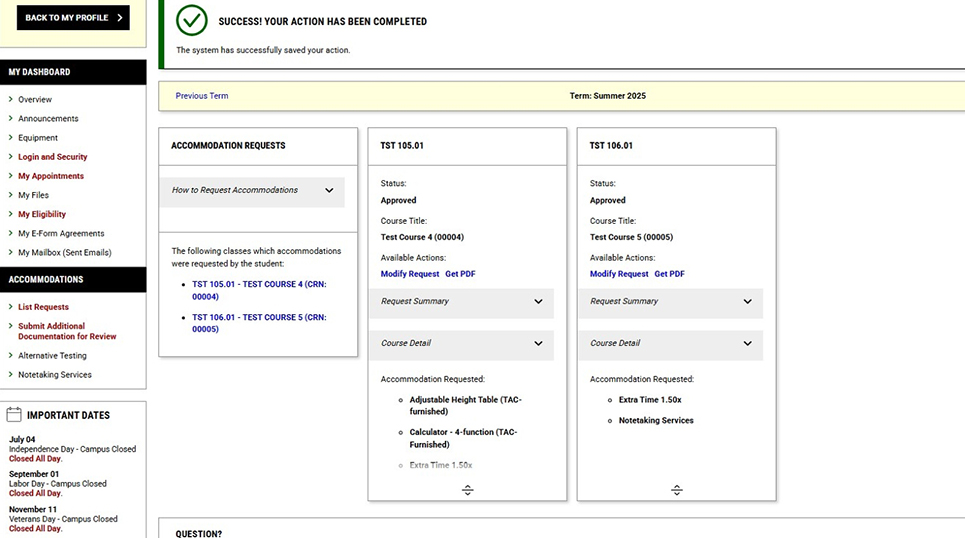
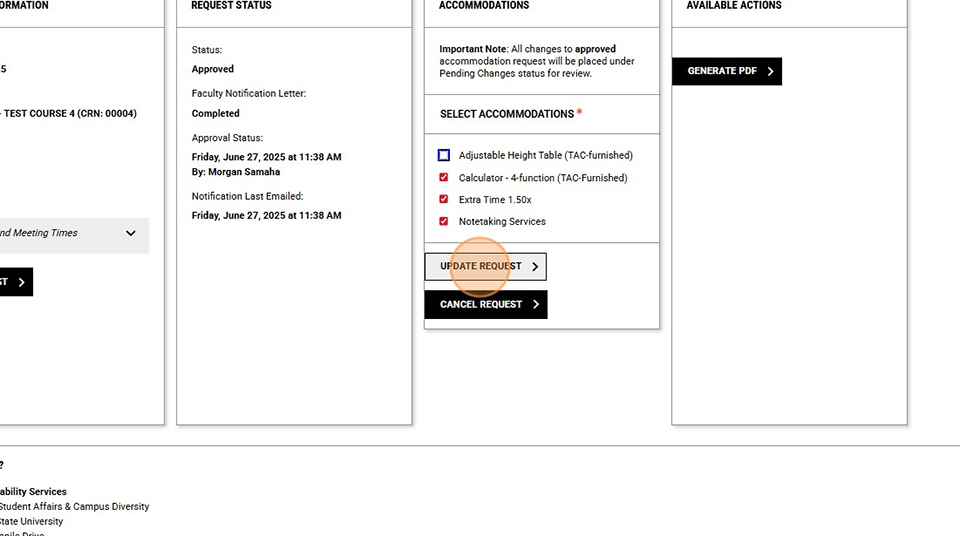
- If you made an error, you can select "Modify Request" to make the correction.

- Select/de-select any accommodations, and click "Update Request".
1. Log-In: Click "Sign In" in the Student and Staff block (with the power symbol). 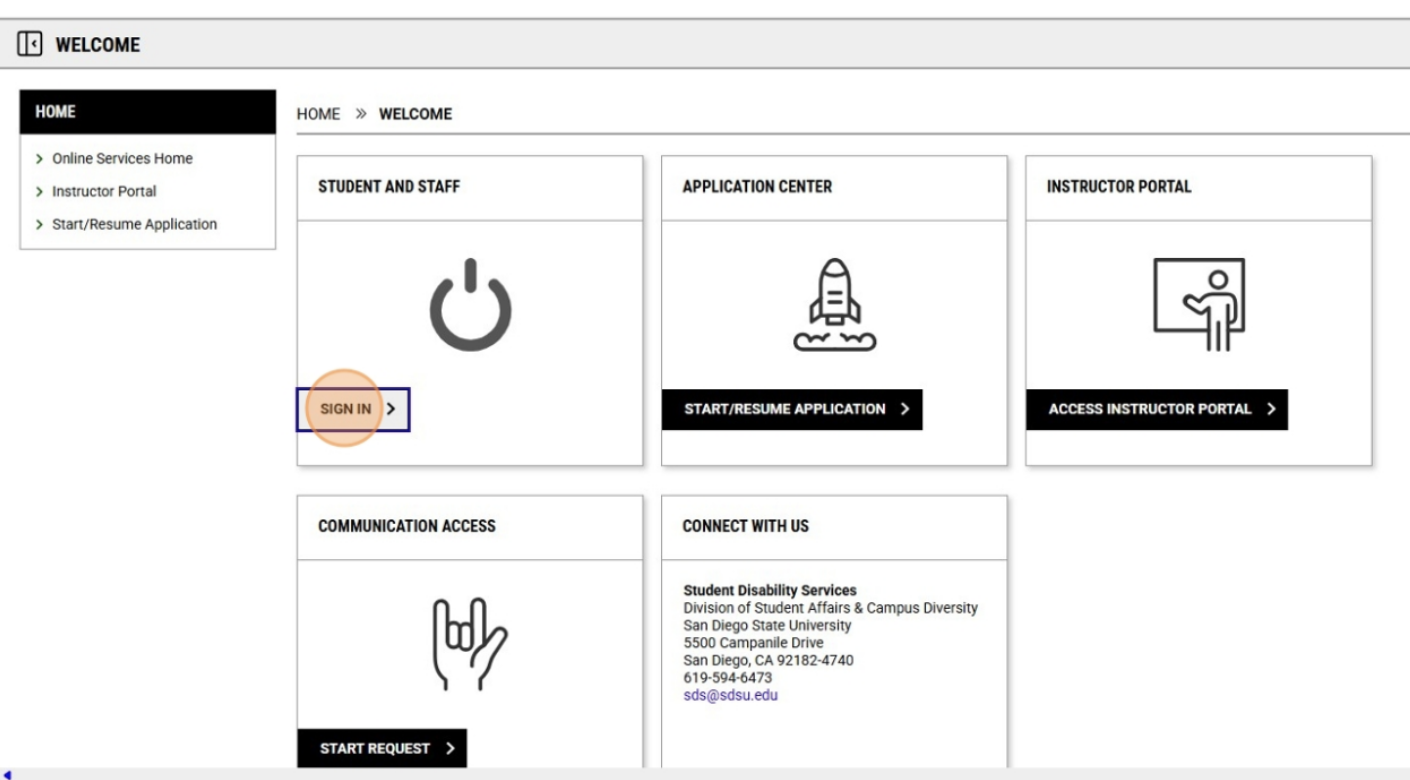
2. Sign in using your SDSU email address and password. 
3. Go to Your Testing Home Page: Click "Alternative Testing". 
4. Select the class for which you want to schedule an exam from the dropdown menu and click "Schedule an Exam". 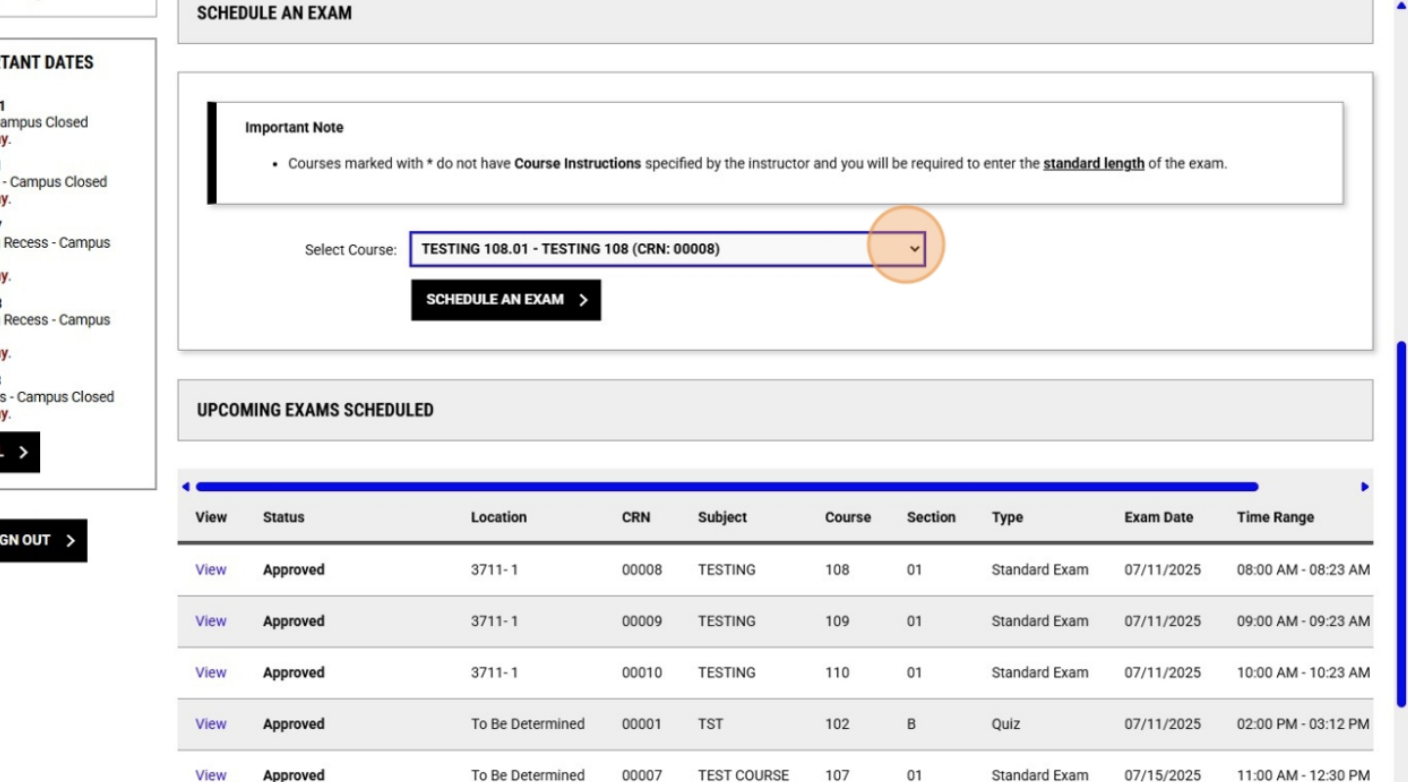
5. Select an exam from the "Available Exam Dates" dropdown menu. 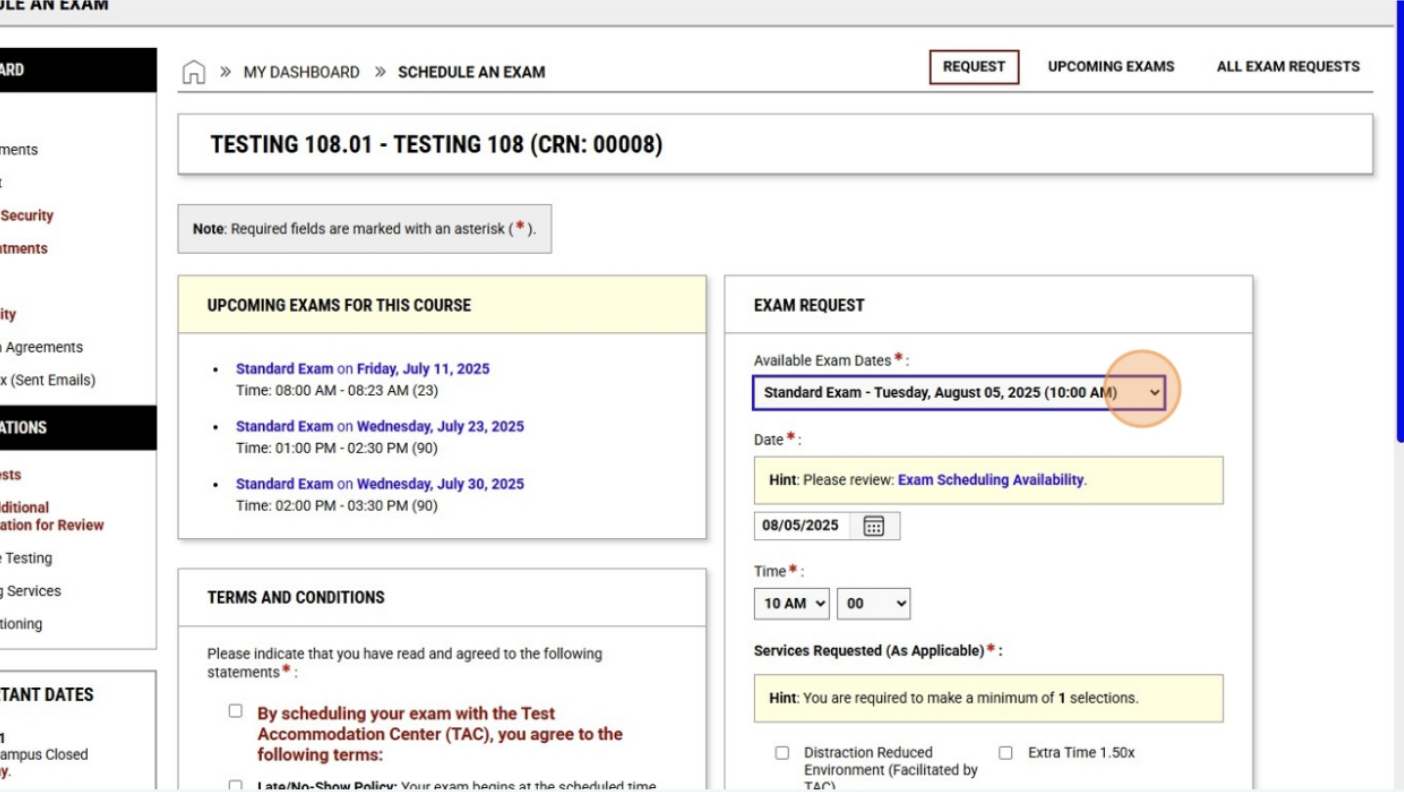
6. Select the accommodations you want to use during the exam. 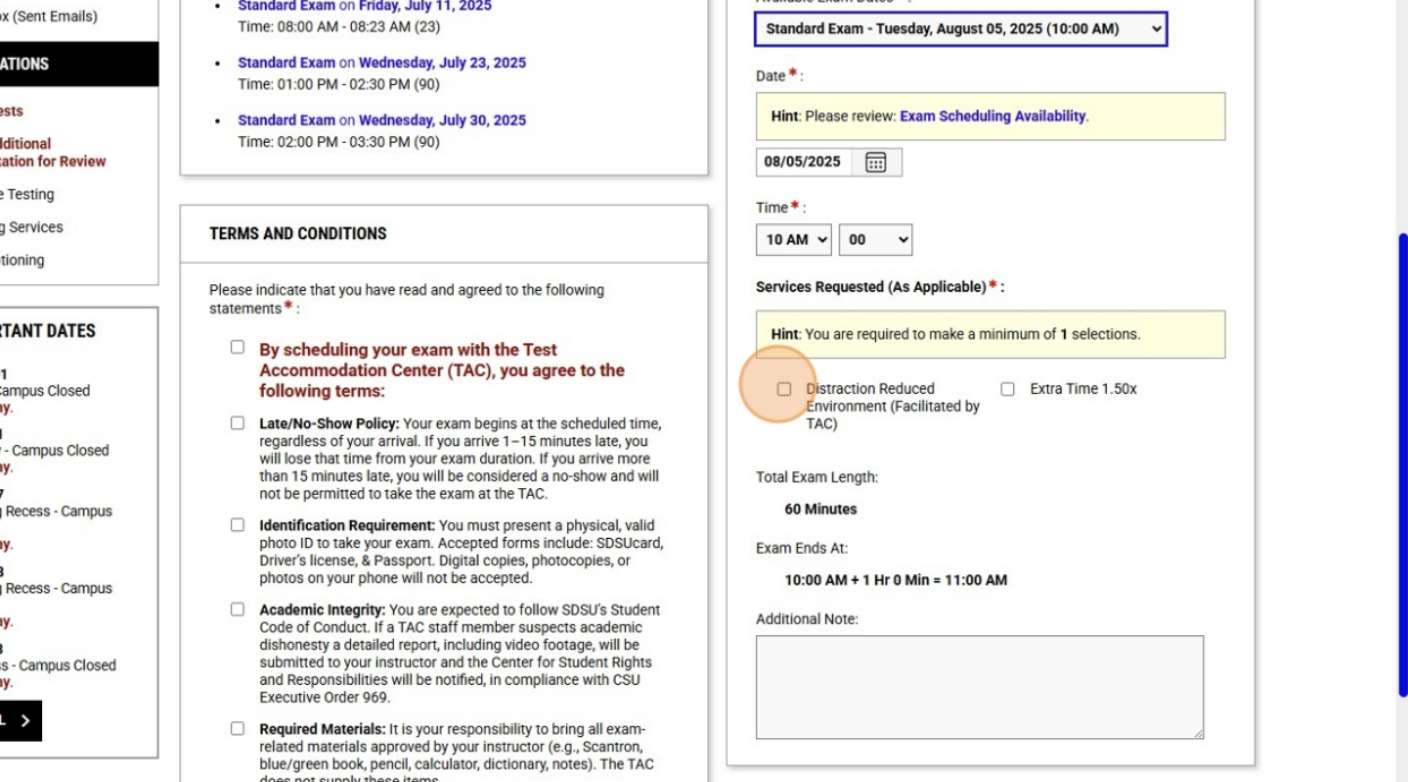
7. Read all the TAC terms and conditions completely and click the boxes next to each each one. 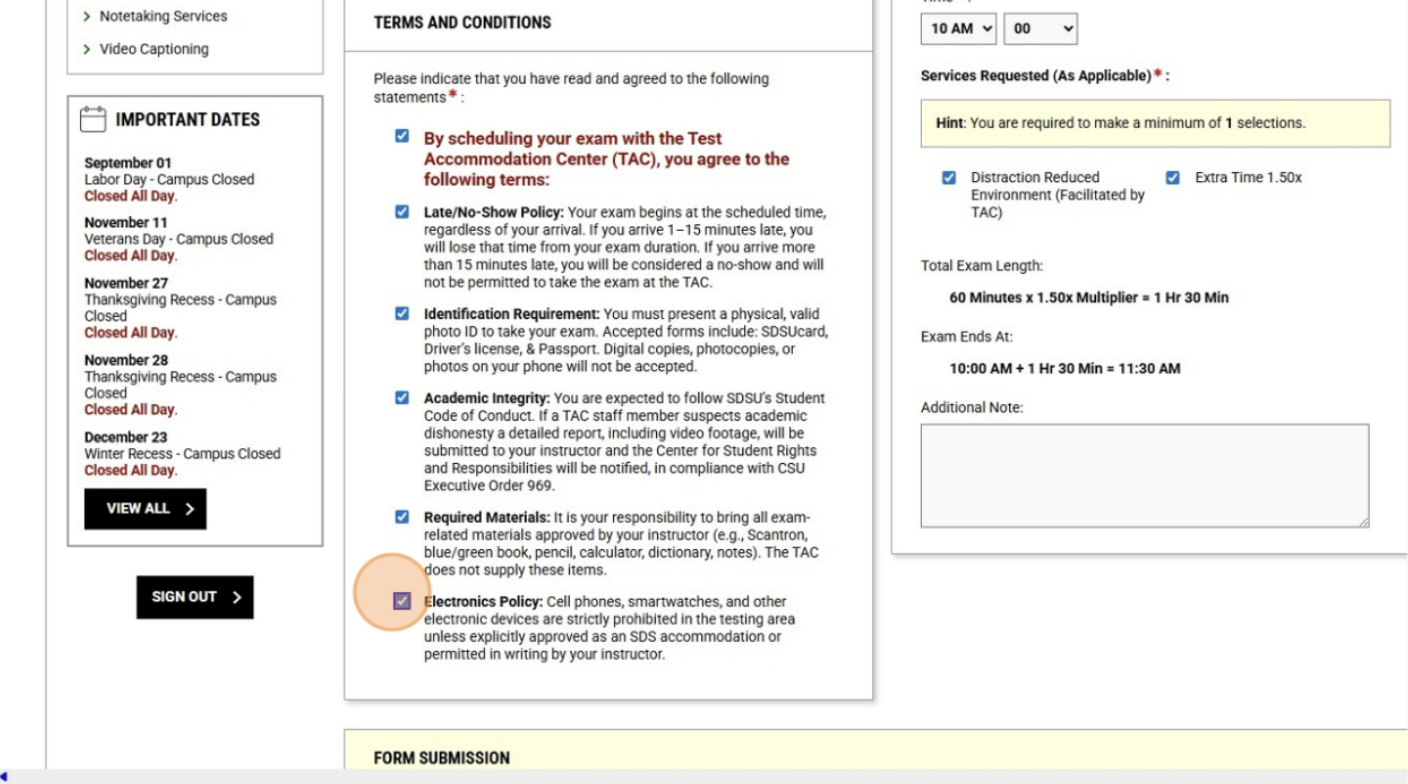
8. Click "Add Exam Request". 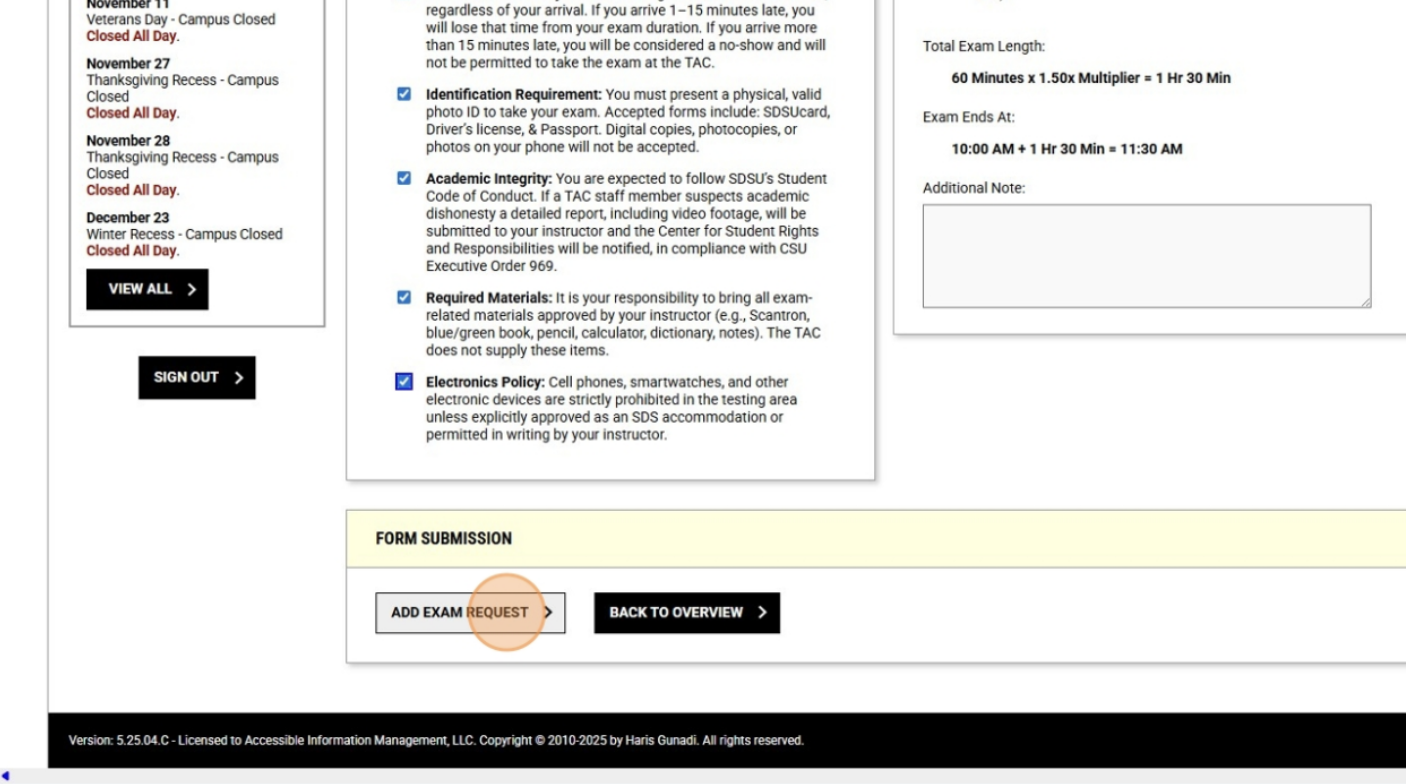
9. Your exam has now been scheduled! If you wish to schedule more exams for this class, select each additional exam from the "Available Exam Dates" dropdown menu and repeat steps 4, 5, & 6 for each date. 
10. Viewing Your Booked Exams: Click on "Alternative Testing" in the menu on the left. 
11. On your Testing home page, you will see a list of upcoming booked exams you have at the TAC, including the one you just scheduled. 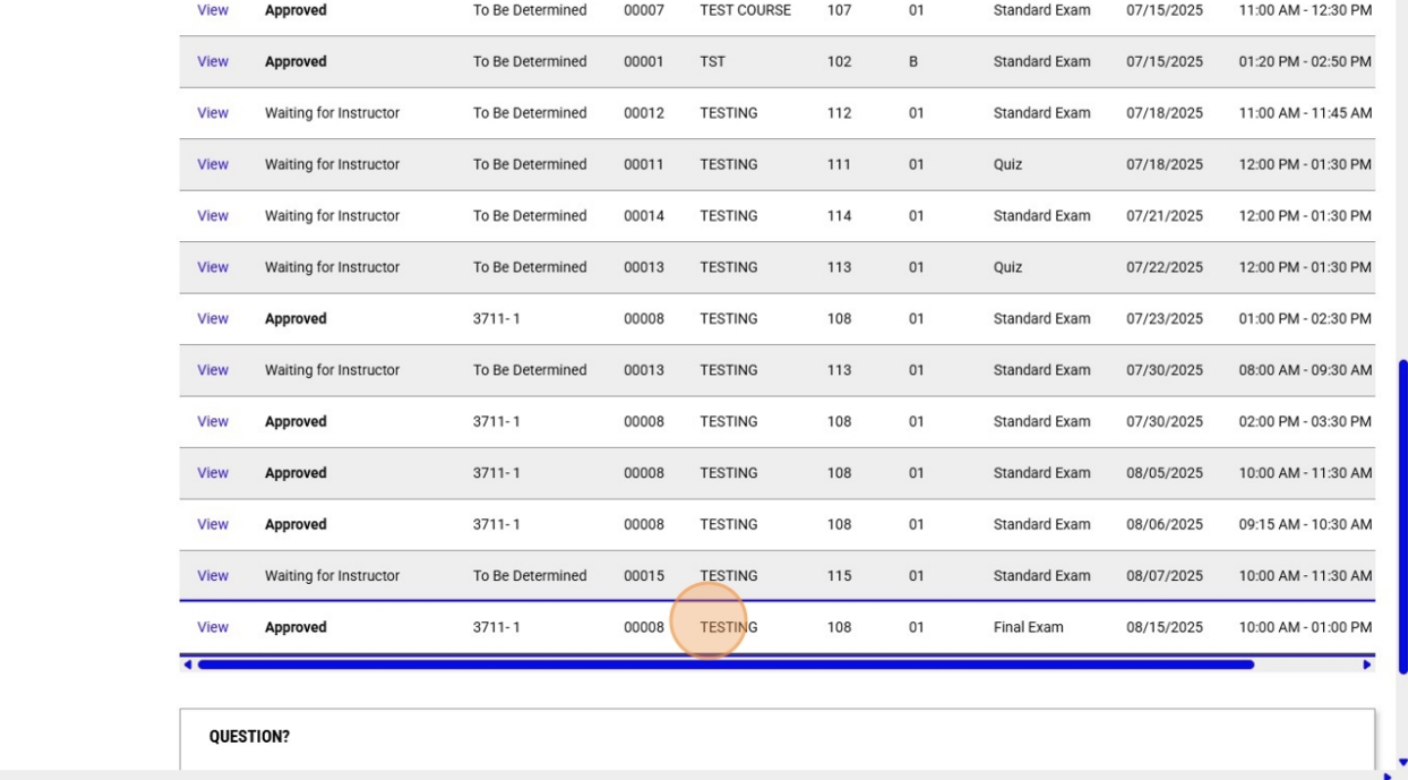
12. Scheduling an Exam in a Class Without Course Instructions: If when selecting your class, you see an asterisk (*) next to the course number, that means your instructor has not yet submitted Course Instructions. Move forward to schedule your exam anyway. 
13. You will see a message at the top of the screen explaining our need for the Course Instructions from your instructor. Because we will not yet have the Course Instructions, the exams dates will not be populated in a dropdown menu. You should select the exam date manually and continue through the exam scheduling process. Your exam booking will go into the system, but it will remain pending until we receive Course Instructions from your instructor. 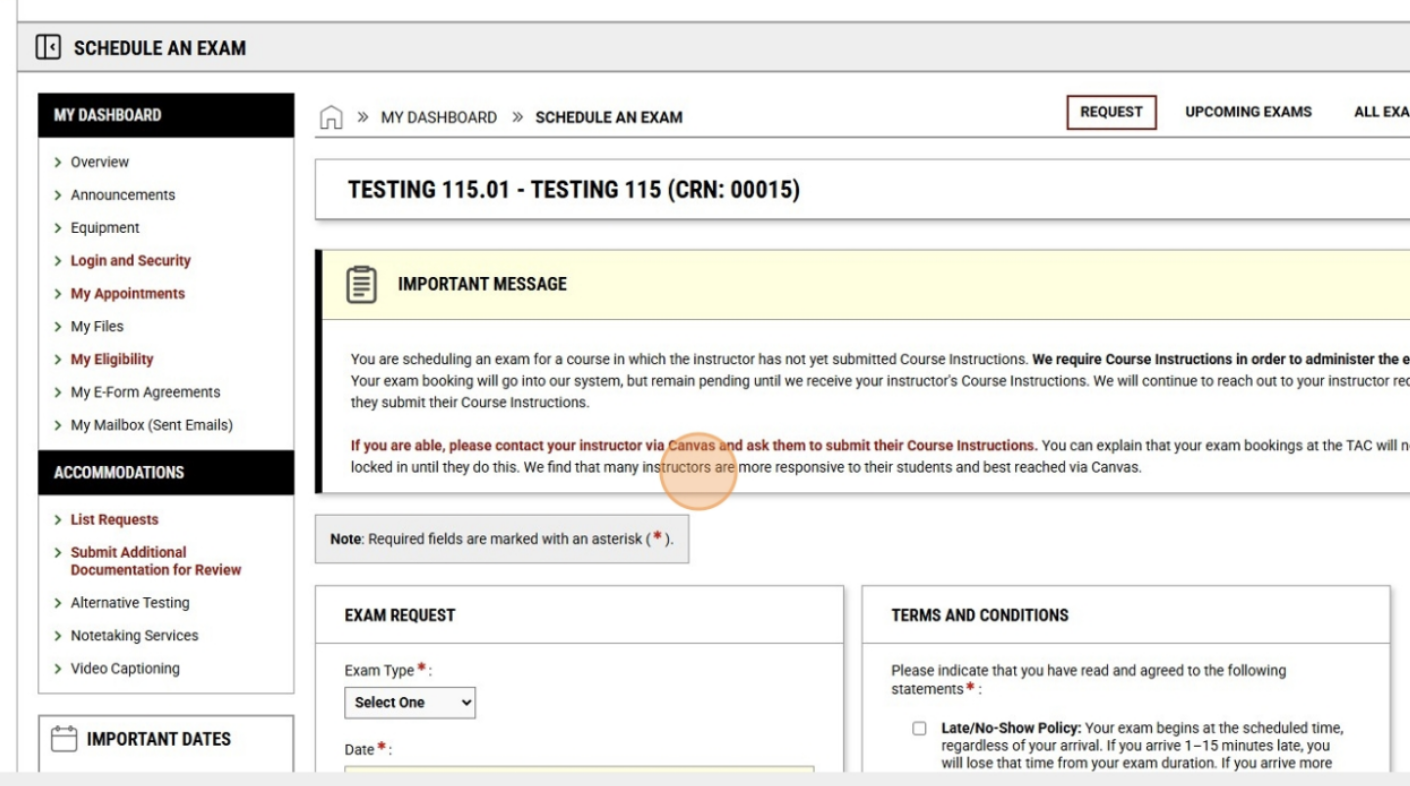
14. Late Bookings: If you try to schedule an exam less than 5 business days in advance, you will receive an error message explaining that you will not be able to schedule that exam. The message will outline your options. 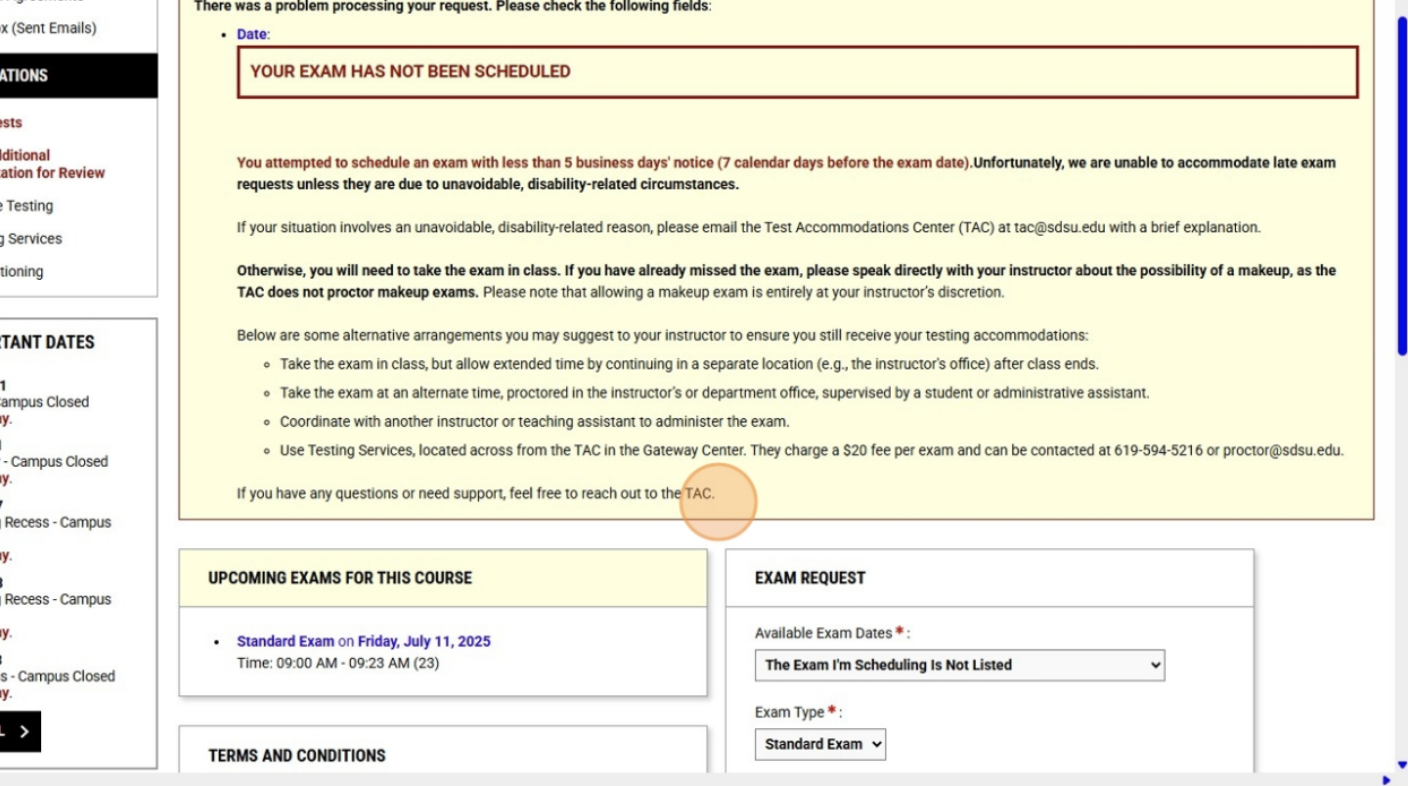
Guides for Faculty
Instructors can view their students' accommodation letters online through our online accommodations management system, SDS Connect.
Accessing your students' accommodation letter via SDS Connect:
1. Access the SDS Connect portal via the SDSU Connect website. You will be required to log in with your SDSUid single sign-on credentials with DUO multi-factor authentication.
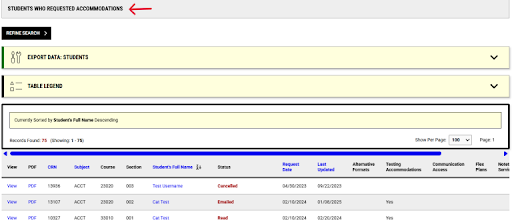
2. The instructor overview will default to the current term and show the list of requested accommodations. The Home menu will always be displayed on the left side.
3. Under “Students Who Requested Accommodations” you should now see a list of your students that have submitted their accommodation letter to you. Click on the View link to view the accommodations for that specific student. Click on the PDF link to download a copy of the accommodation letter.
We advise all registered SDS students to submit their accommodations through SDS Connect as early as possible into the semester so that instructors have enough lead time to ensure accommodations can be made.
However since students may be registering with SDS throughout the semester, we recommend checking this list before every upcoming exam.
What do I do after viewing my students' accommodation letters?
If your students have testing accommodations, they may be scheduling their upcoming tests using SDS Connect to take at the Test Accommodation Center (TAC).
SDS Connect will send out an email reminder to instructors for upcoming tests. These emails are sent out six (6) days and one (1) day before your upcoming test. These emails will have information regarding how to provide information about your upcoming tests.
If there is an accommodation listed on the students' accommodation letter that you have questions about, please contact the Student Disability Services (SDS) at [email protected].
Note: If you are a student assistant (SA) or graduate assistant (GA), you should have been assigned a separate work email account. This will be the email address where SDS Connect will send emails to. Please contact our IT department to find how to access your work account.
If you require additional support or have any concerns or questions, please reach out to the TAC at [email protected].
1. Log-In: Click "Access Instructor Portal" in the Instructor Portal block. 
2. Click "Continue to View Student Accommodations". 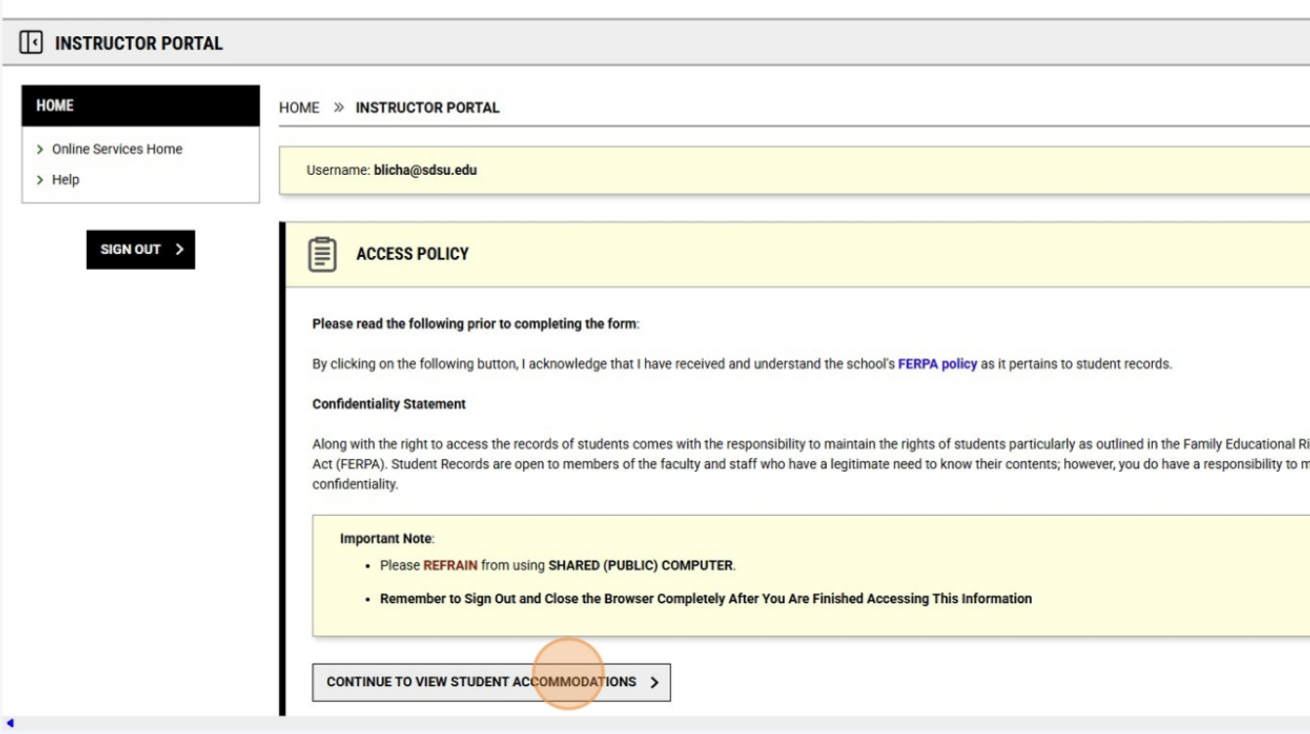
3. Navigating to you Testing Home Page: " Click "Alternative Testing". 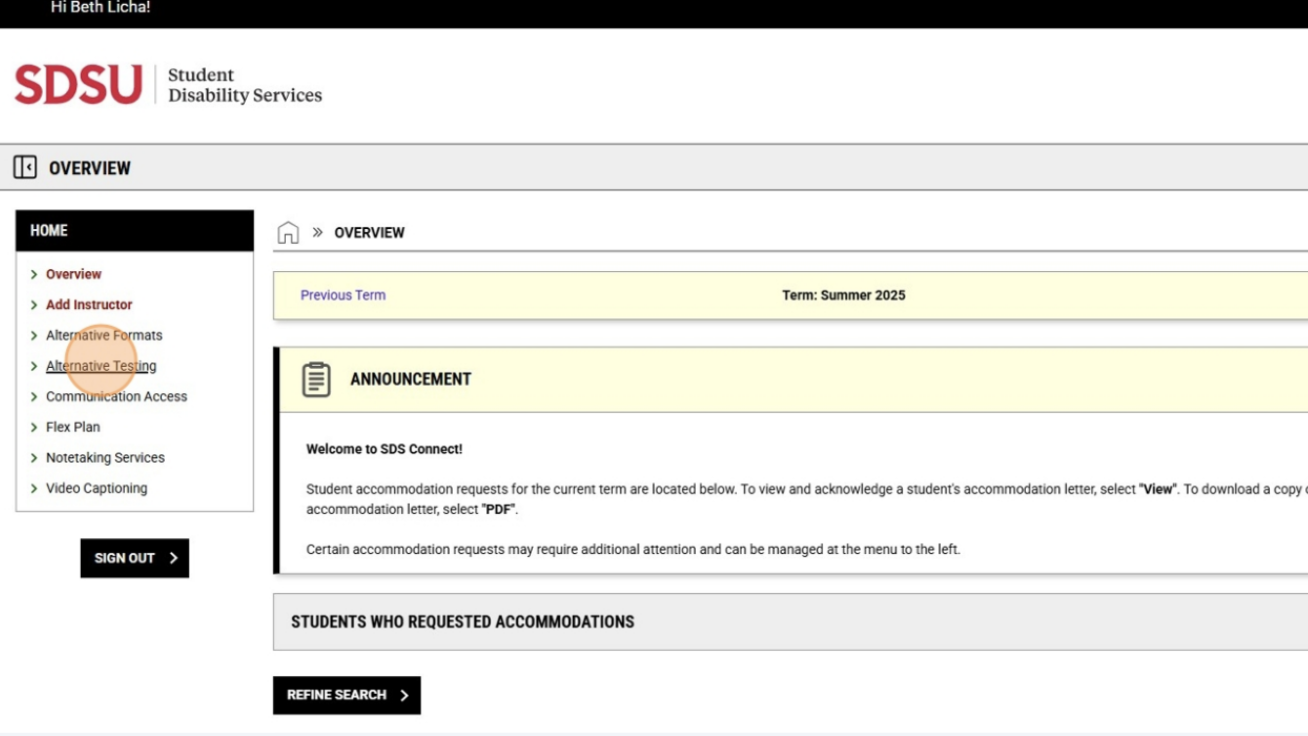
4. Here you will see the number of exams your students have already scheduled prior to the submission of your Course Instructions, the number of classes in which you still need to submit Course Instructions, and the number of exams on the calendar for which you have not yet uploaded exams. 
5. Completing Your Course Instructions, i.e.- Setting Up Your Classes for TAC Proctoring: Click "Courses without Course Instructions". 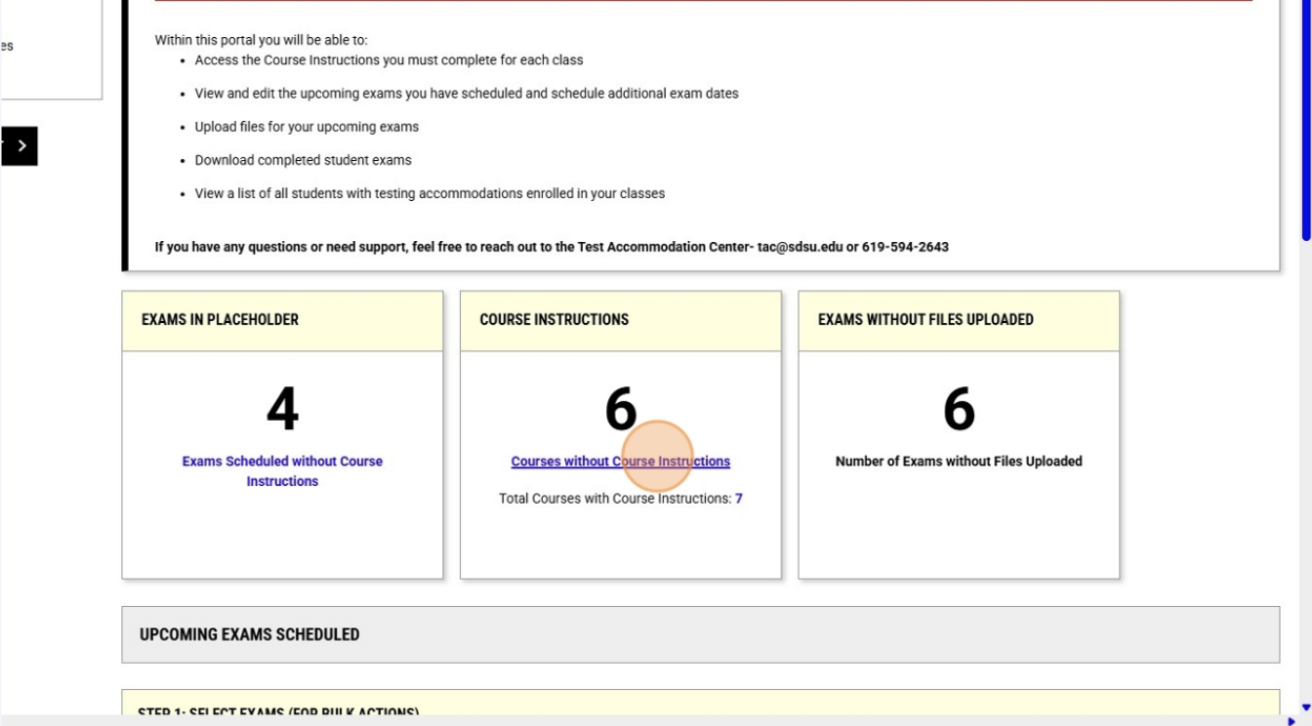
6. Here you will see a list of all classes for which you need to complete Course Instructions. To begin submitting Course Instructions for each class, Click "Specify Course Instructions" in the block for the class. 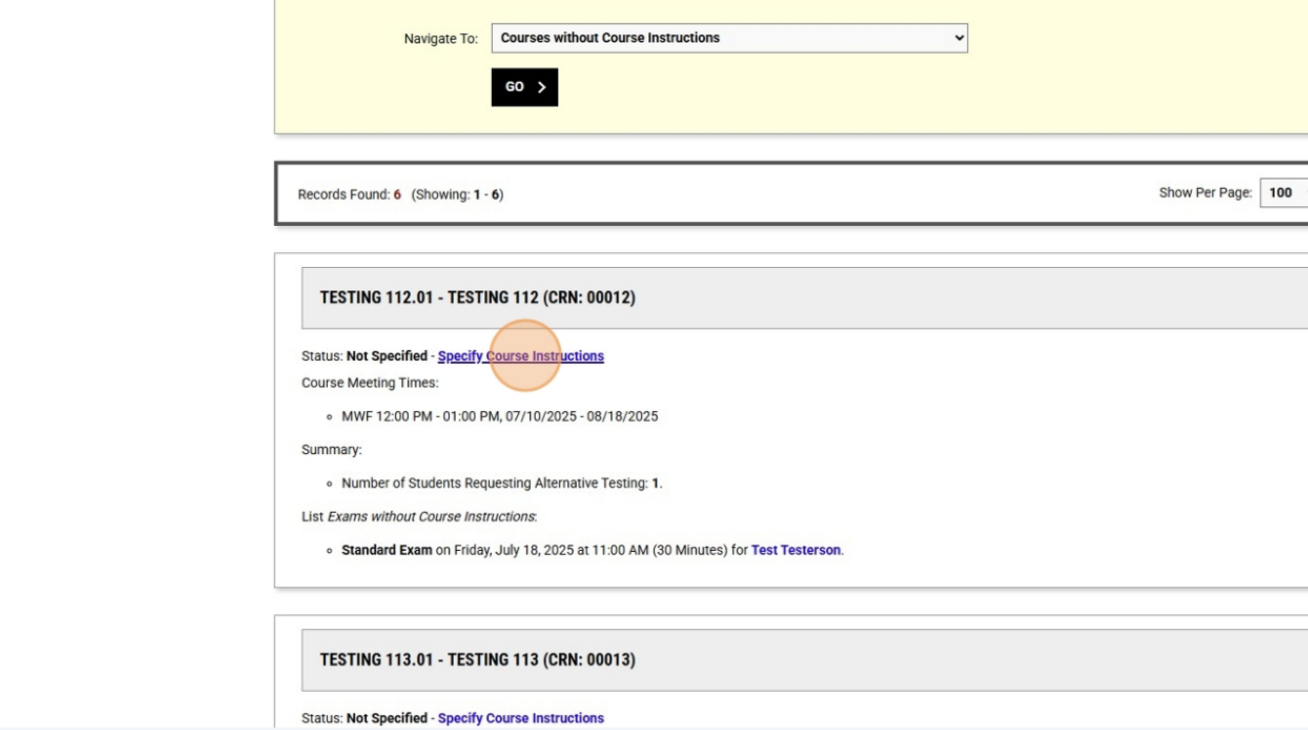
7. Select your preferred proctoring option from the dropdown menu. "SDS Will Proctor Exams" is the most preferred option. Click "Confirm to Proceed". 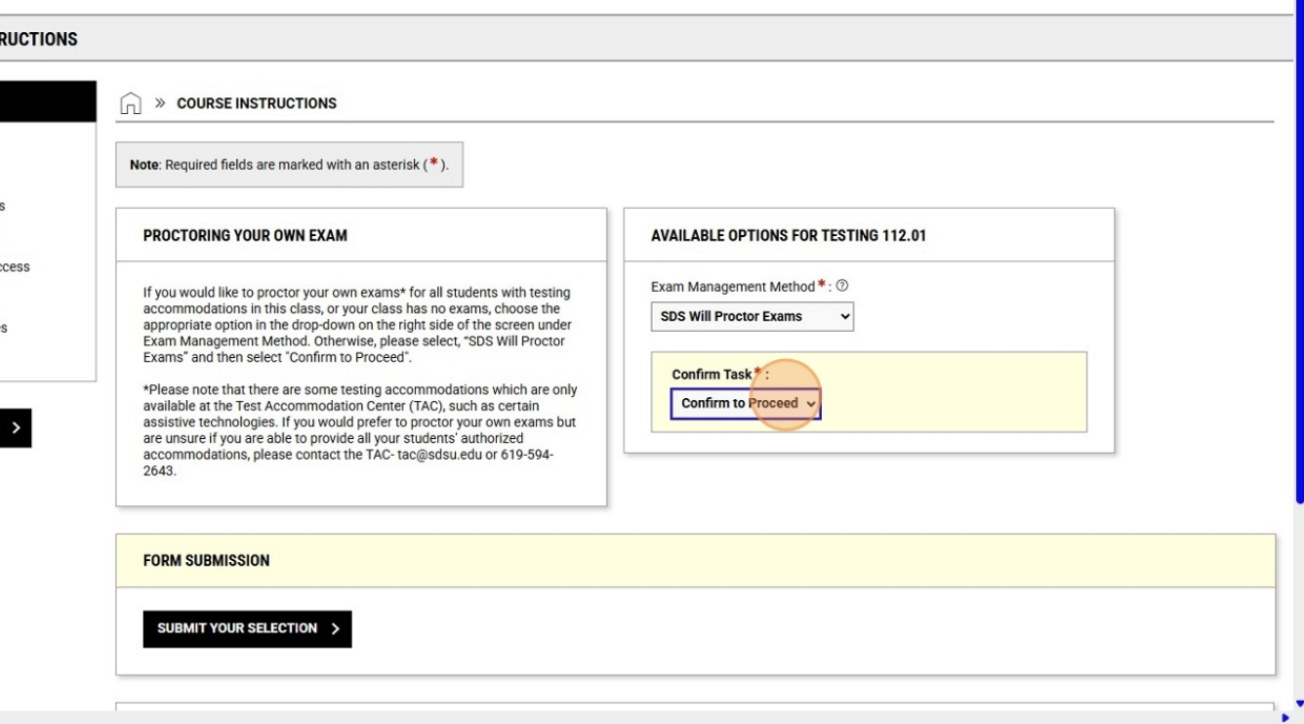
8. Click "Submit Your Selection". 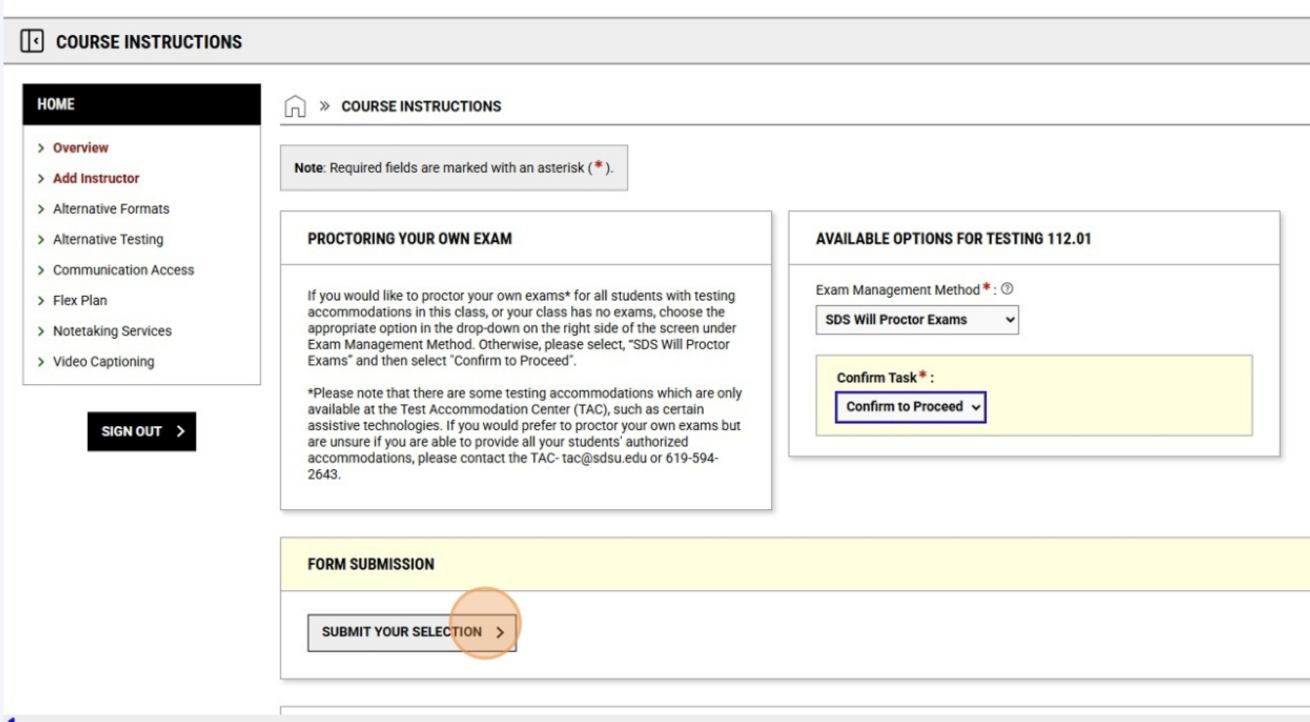
9. This is the Course Instructions page. Please complete it fully. 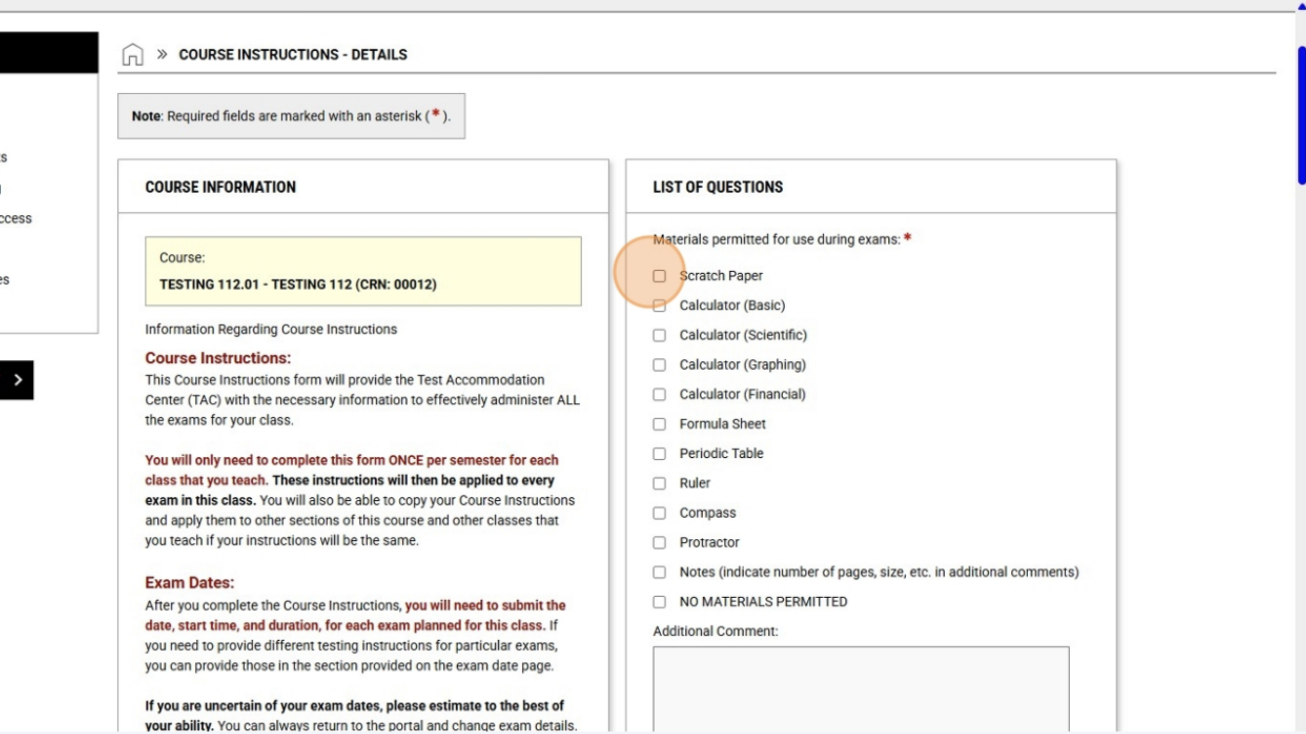
10. Use the additional comments sections to add details, such as what kinds of notes the students can have. 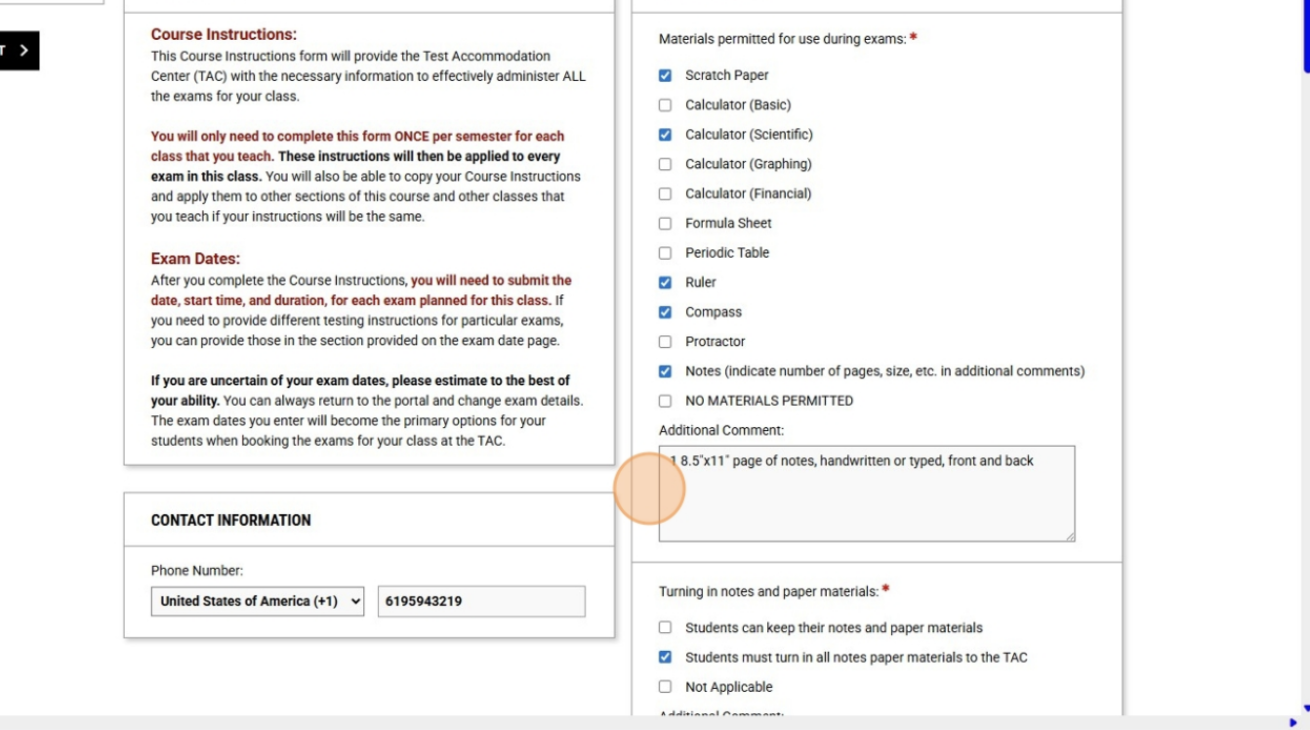
11. Please note that the TAC will no longer be able to return completed exams via email. If you would like your exams scanned and sent to you electronically, they will be uploaded to your SDS Connect account, where you will be able to download them. 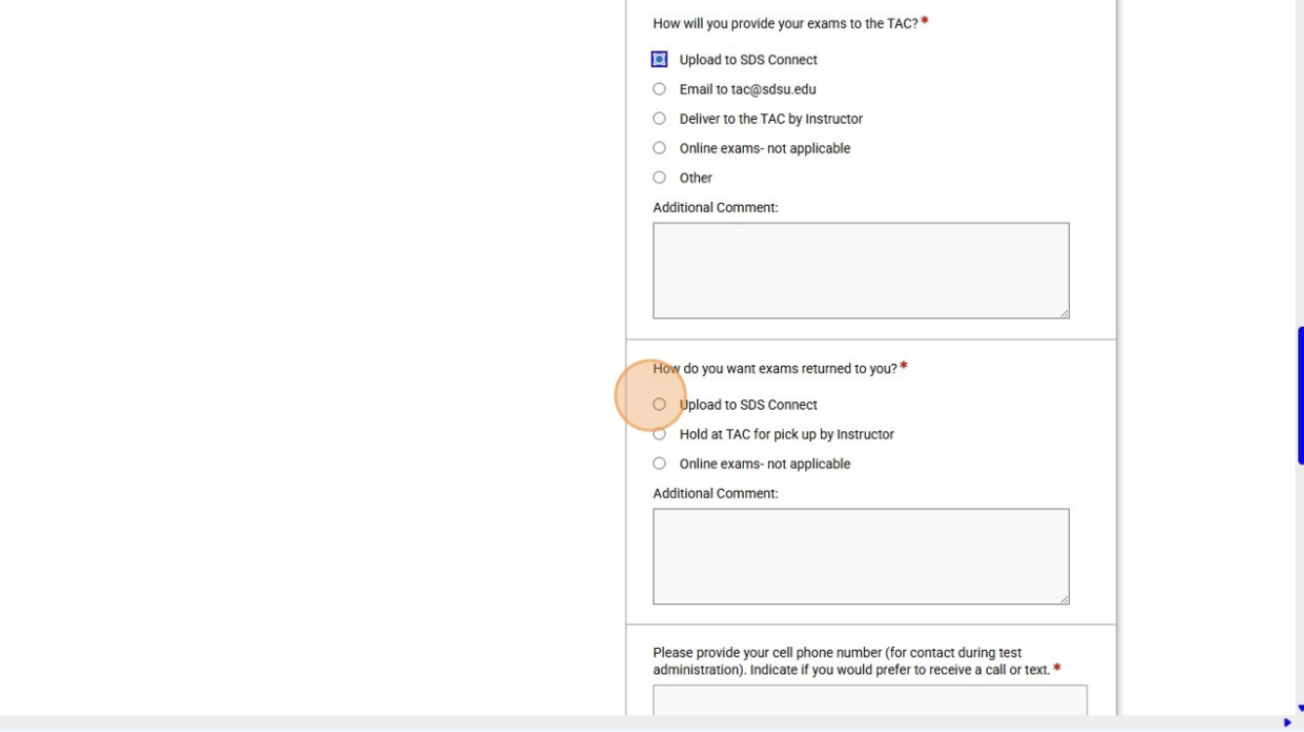
12. Your response(s) to this question will enable us to schedule alternate arrangements with your students without needing to bother you for each individual situation. 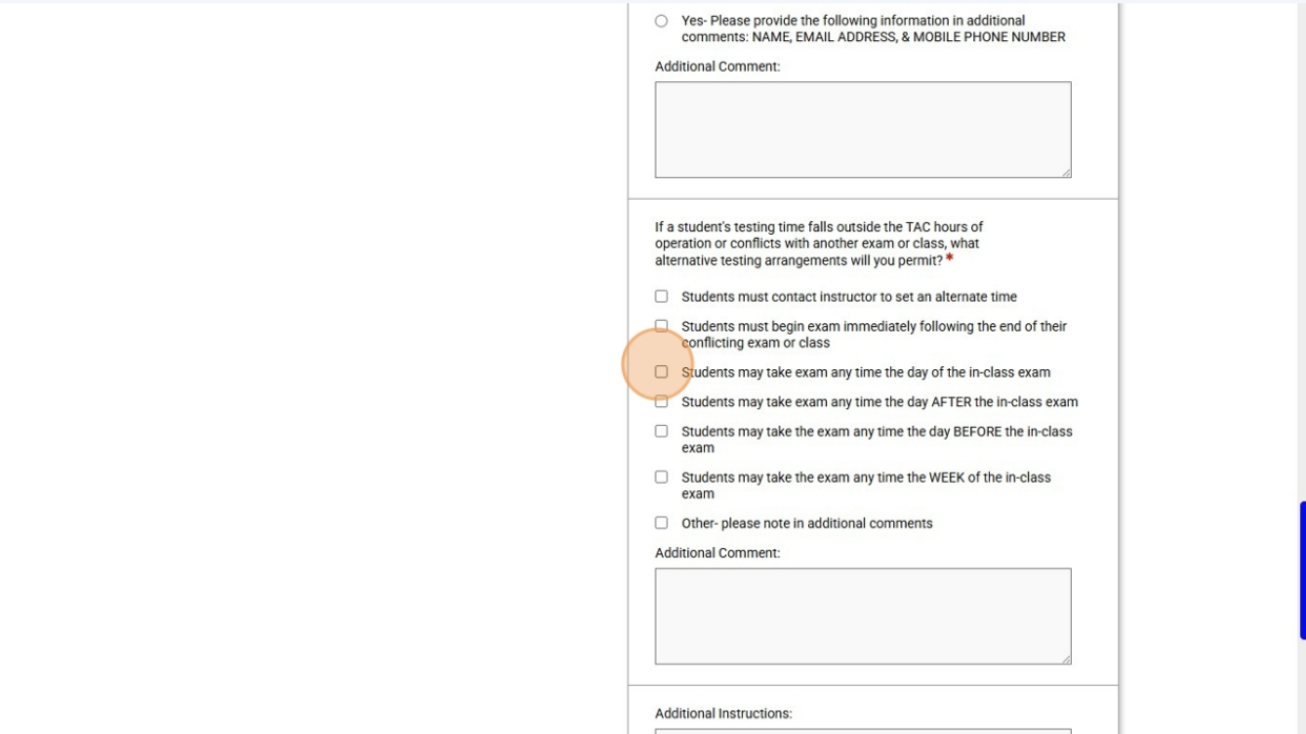
13. Once you have completed the entire Course Instructions page, click "Submit and Continue to Specify Exam Dates". 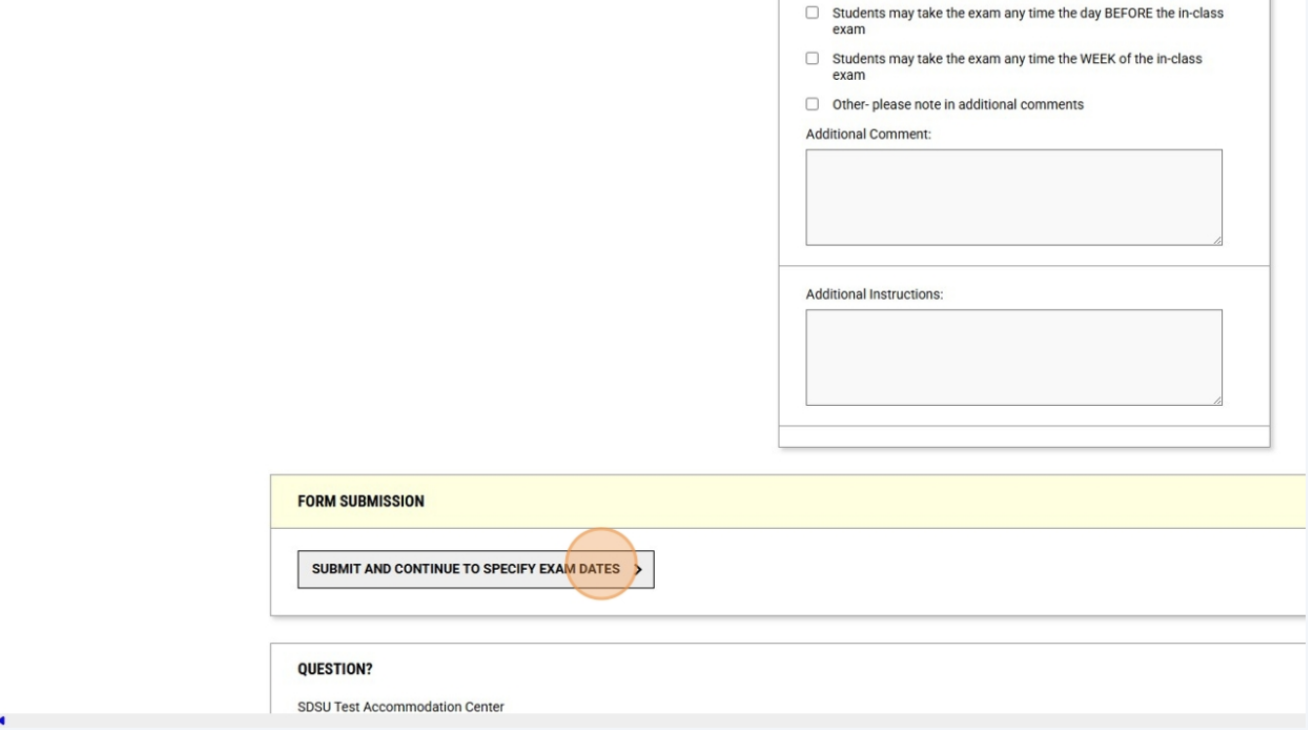
14. Scheduling Exam Dates: You will now need to add ALL the exam dates for this class, including the final. Even if you are uncertain about some of your exam dates, please use your best estimate to set your exam dates. You can always go back and change details later. These dates will become the options from which your students will select to schedule their exams. 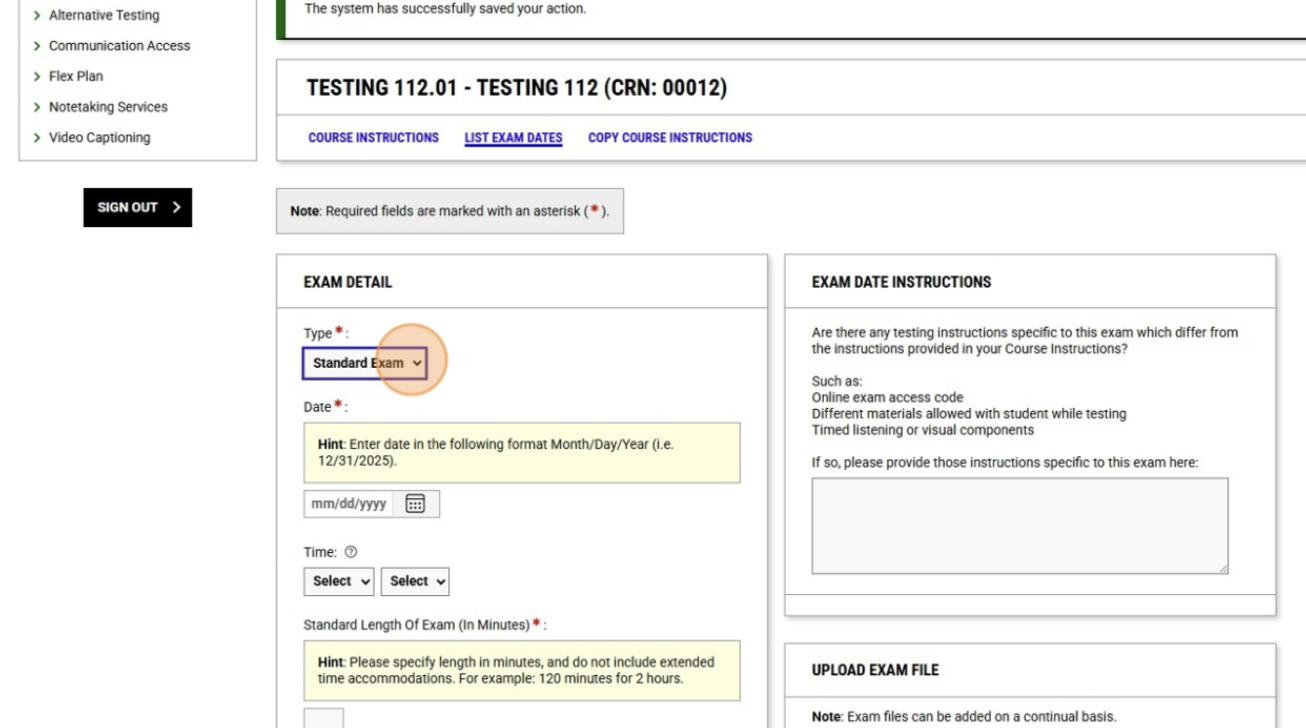
15. Select which kind of exam from the dropdown menu, set the date, time, and standard duration of the exam. Our system will calculate any additional time your student(s) may receive as part of their accommodations. 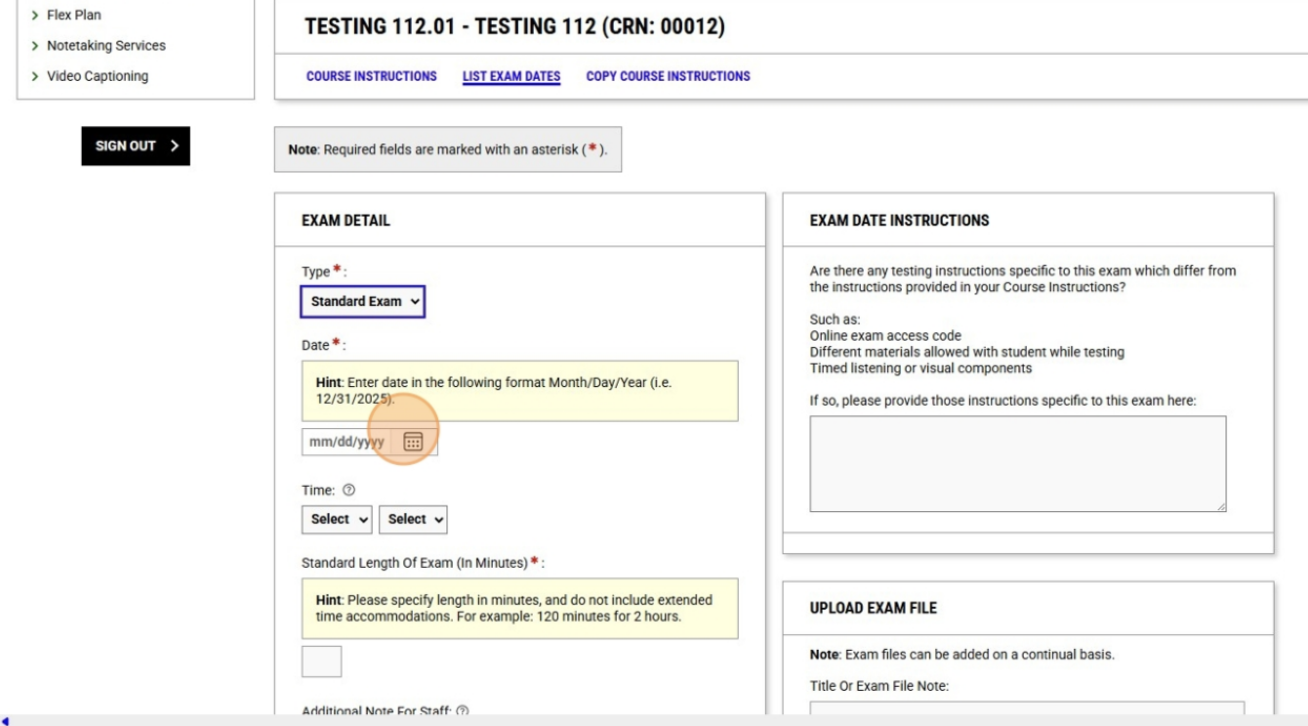
16. Add any instructions that might be specific to this exam only and upload the exam file if you have it ready. If you do not have the exam ready, you can upload it at a later time, but no later than the day before the exam at noon. 
17. Click "Save Exam Date". 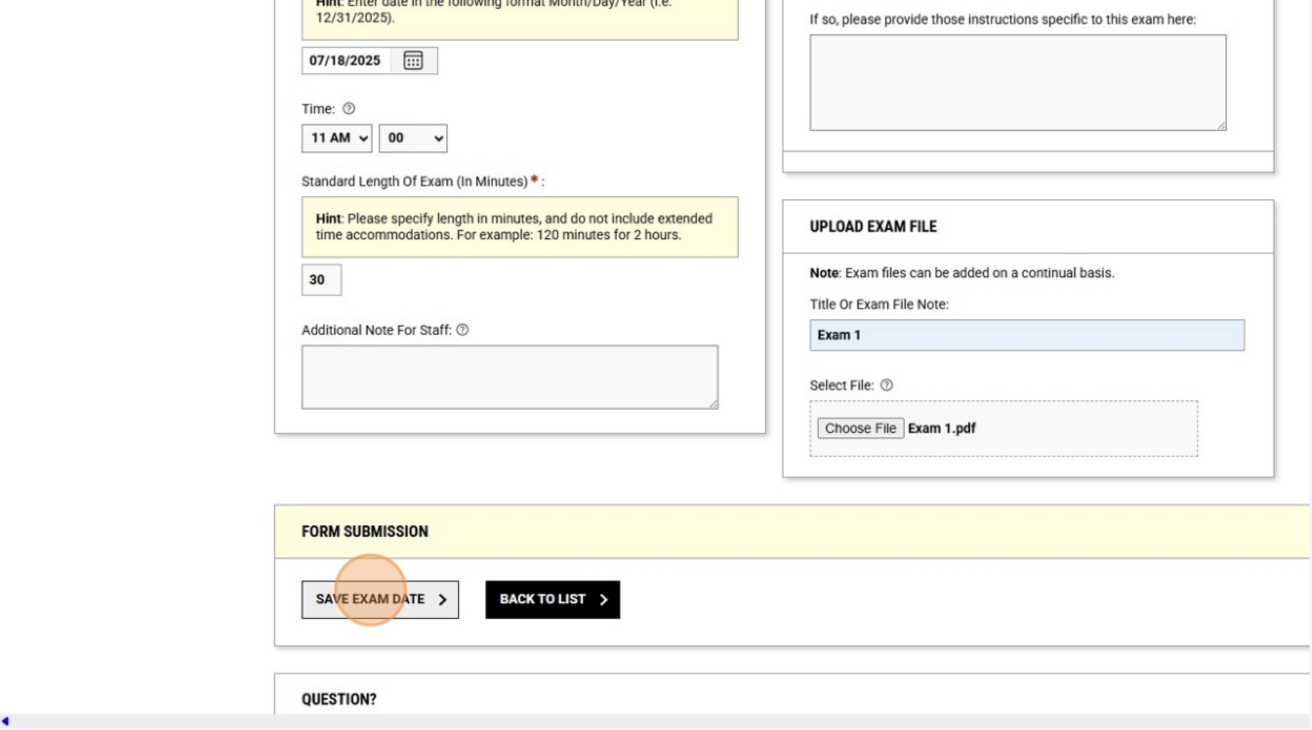
18. Repeat steps 15, 16, & 17 for each exam date in this class. 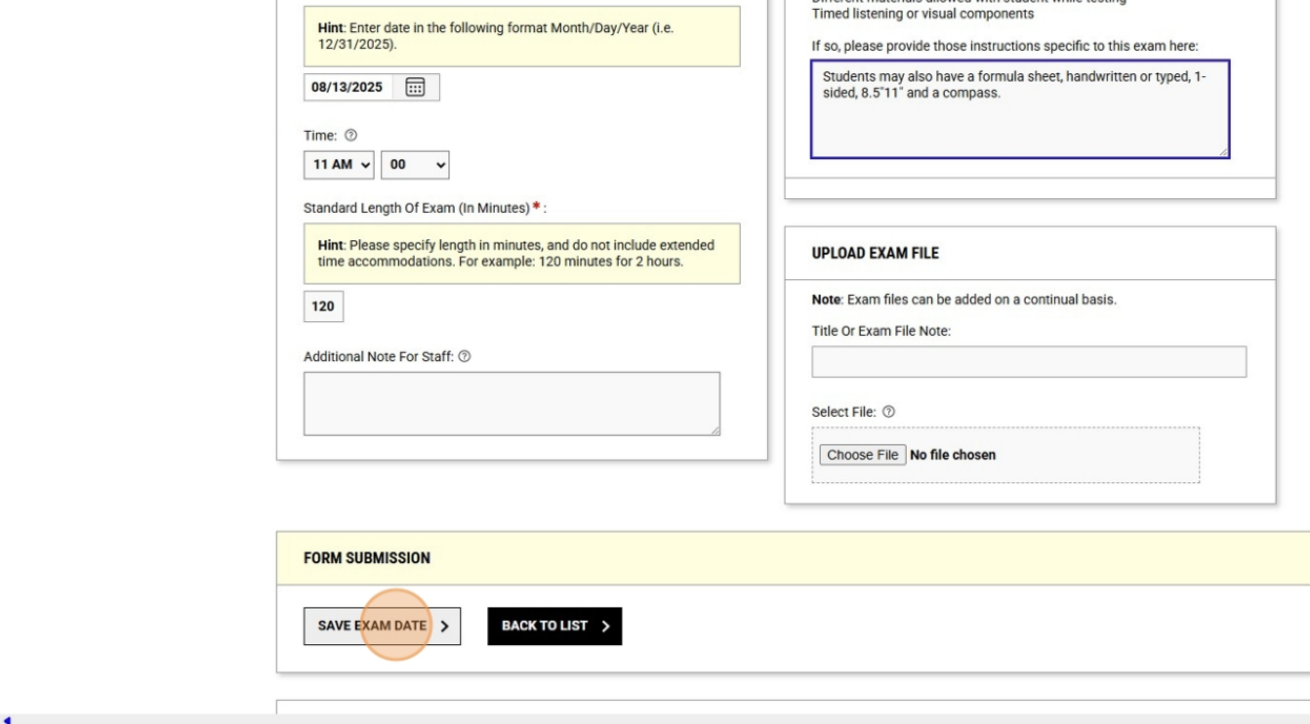
19. Applying a Completed Course Instructions Page to Other Classes: From your testing home page, click "Course Instructions". 
20. Identify the class which has the completed Course Instructions you want to apply to your other class(es) and click "View/Modify Course Instructions" in that class block. 
21. Click "Copy Course Instructions". 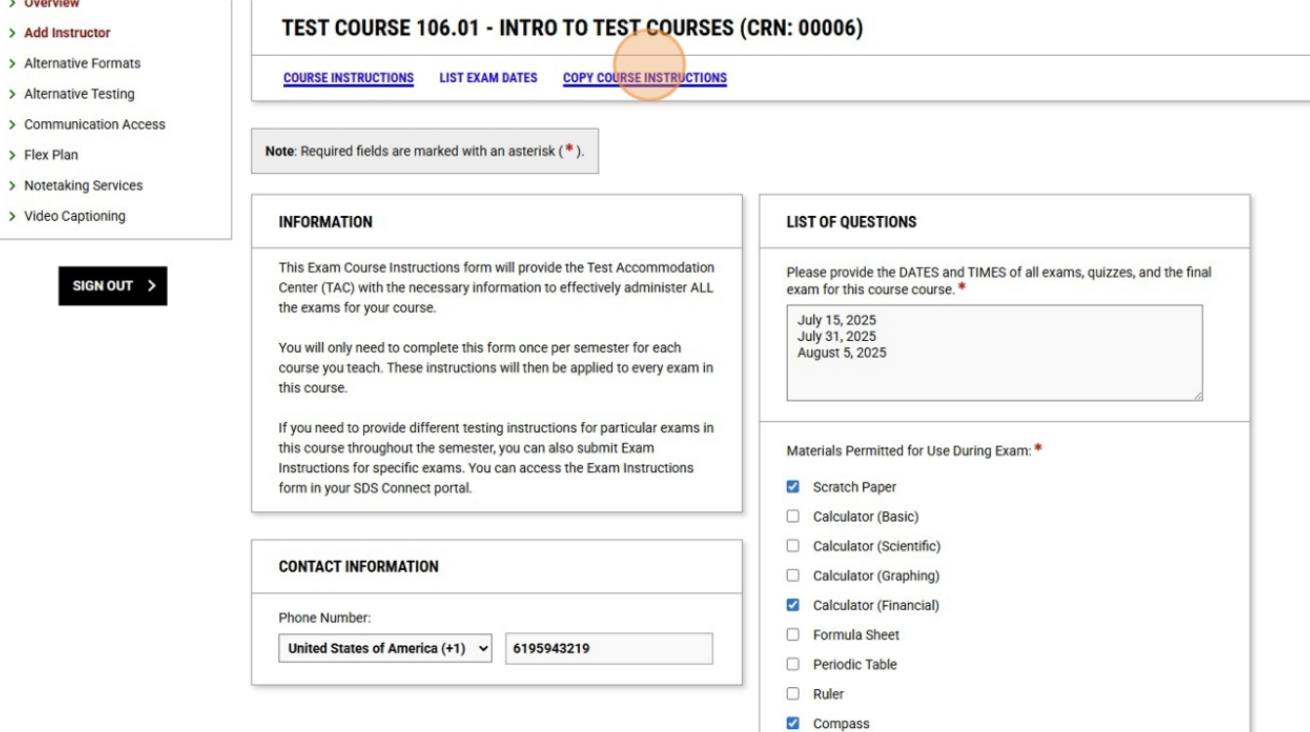
22. The "Copy Course Instructions to" dropdown menu will show all your classes which still do not have completed Course Instructions. Select which class you want to apply these Course Instructions to and click "Continue". 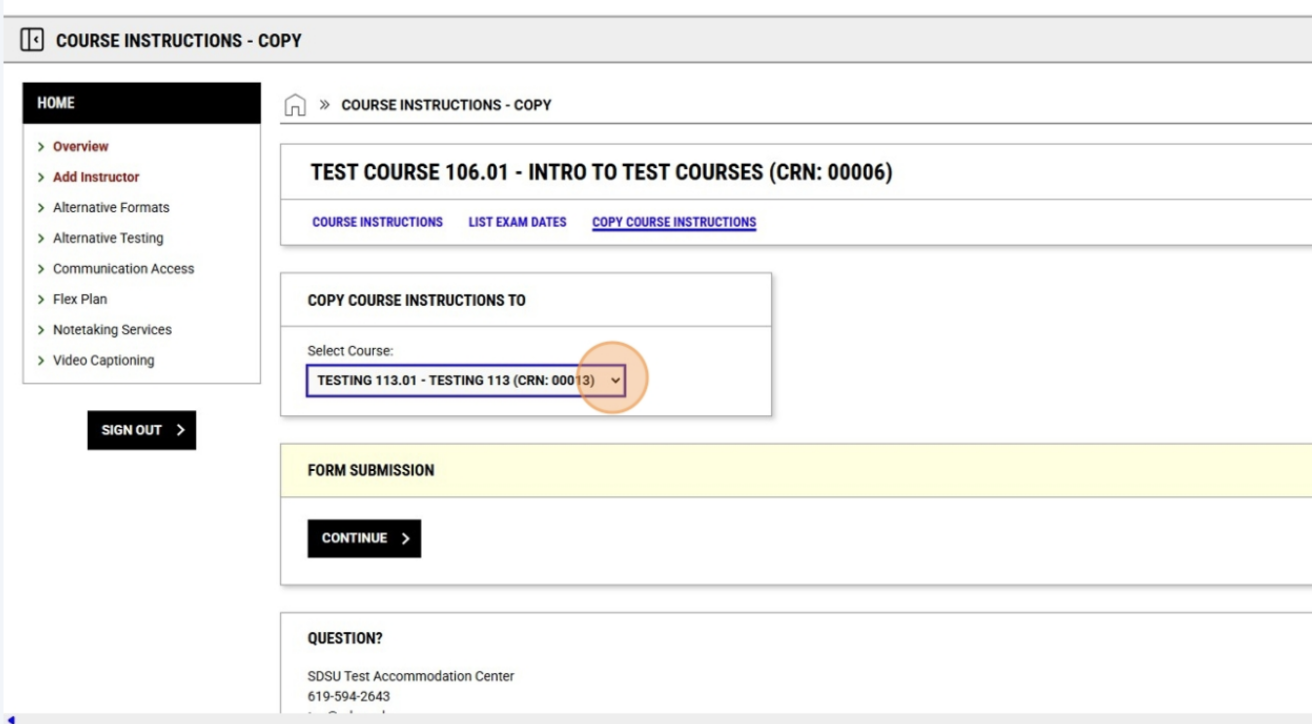
23. Make the appropriate changes to the exam dates and times for the new class. 
24. Make sure to indicate if the same exam should be used for this class, as the
system will link the two classes if "Use Same File" is clicked. 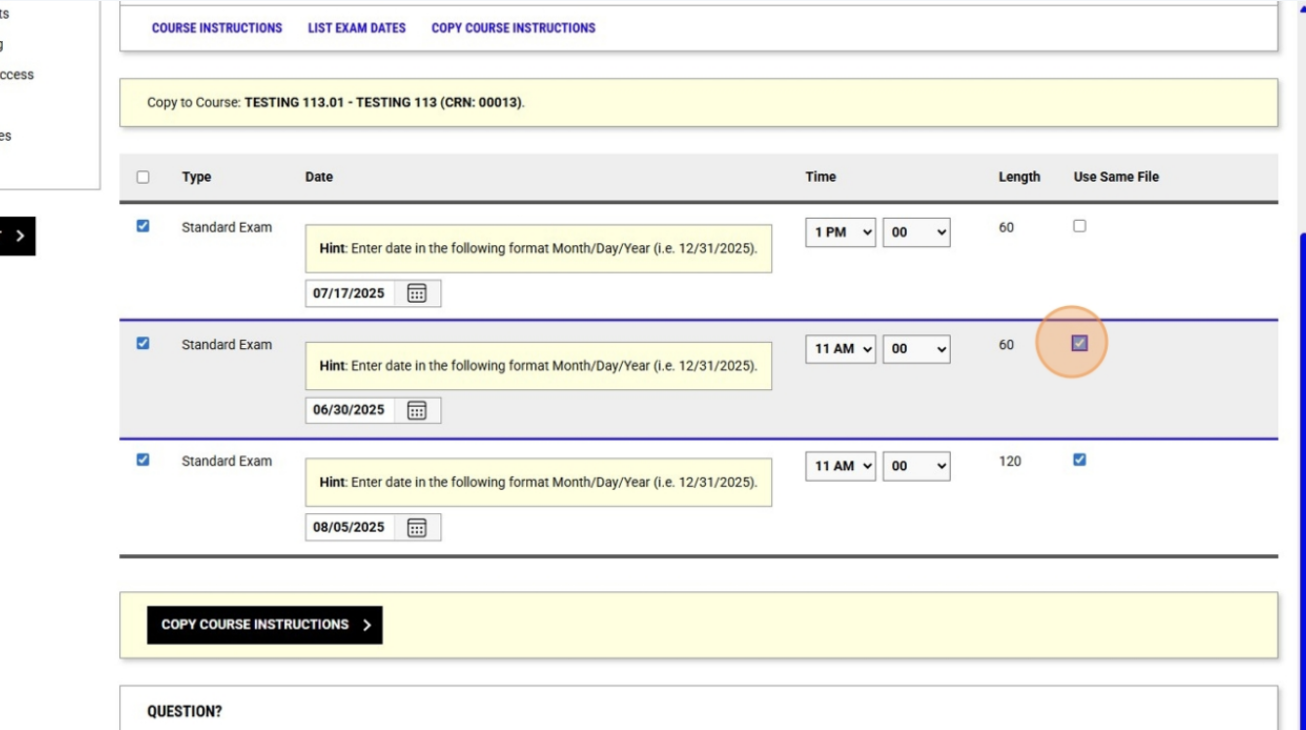
25. Click "Copy Course Instructions". 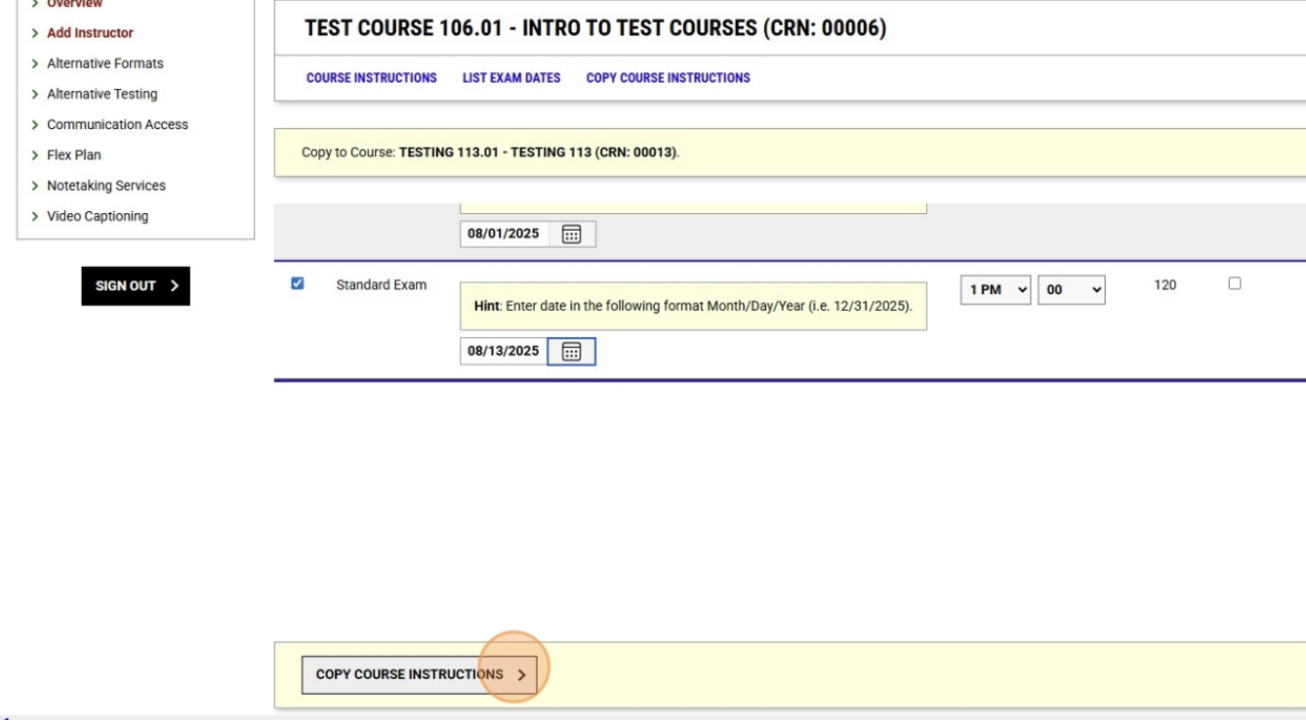
26. You will now have the opportunity to add additional exam dates for this class. 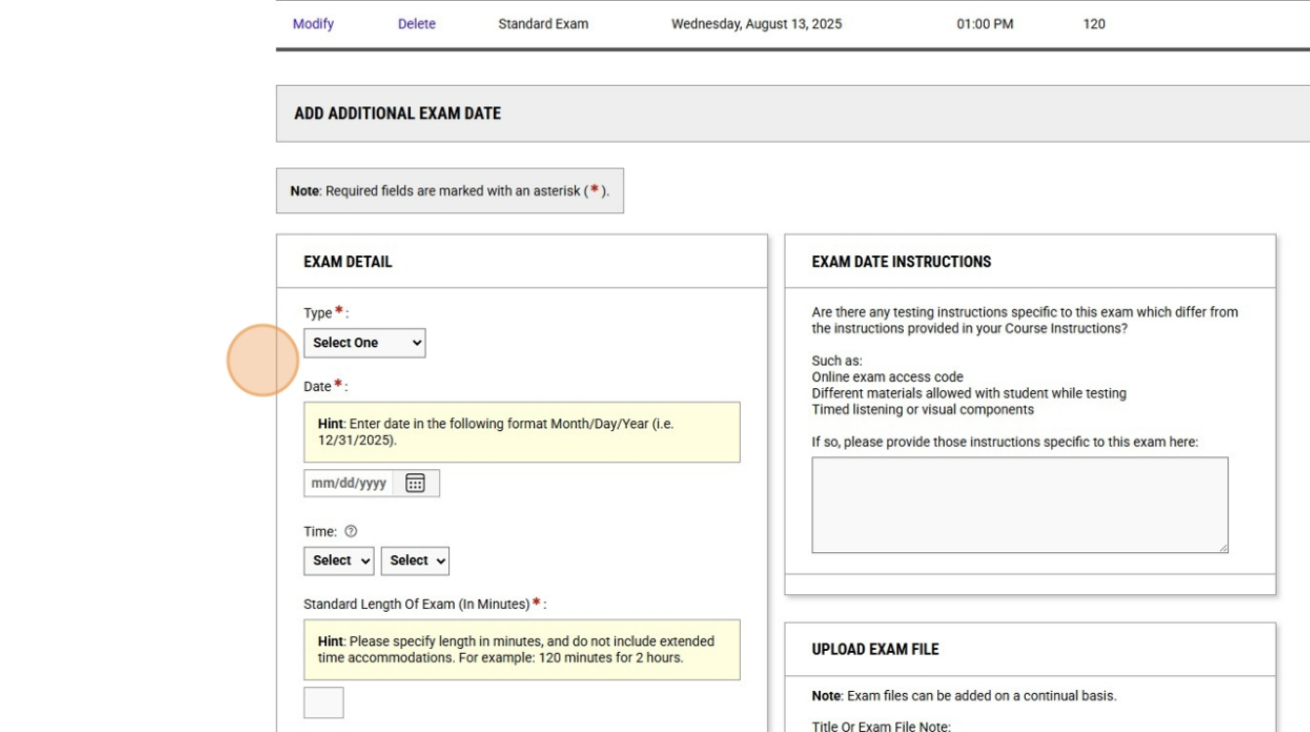
27. When you finished adding an exam date, click "Save Exam Date. If you do not want to add any exam dates, click "Back to List". 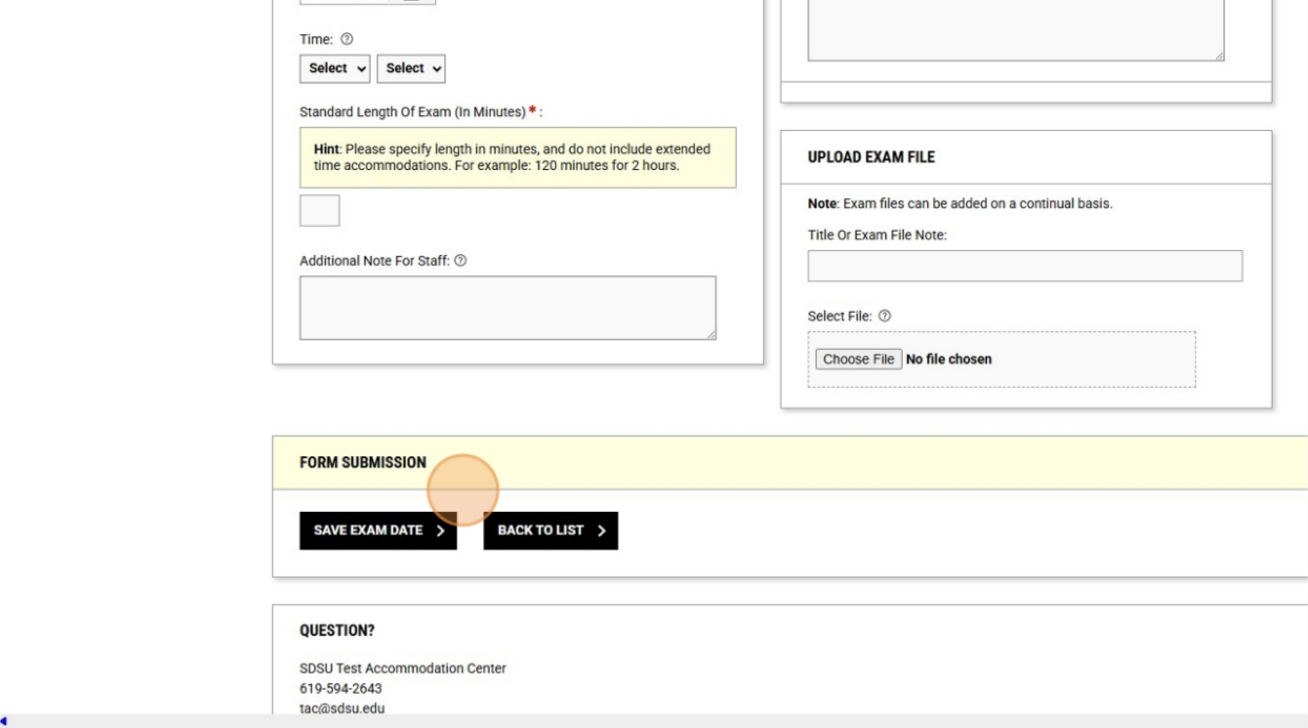
28. Adding the same Exam Date for Multiple Classes at the Same Time: From your Course Instructions page, click the "Handy Tools: Specify Exam Date for Multiple Courses" Dropdown menu. 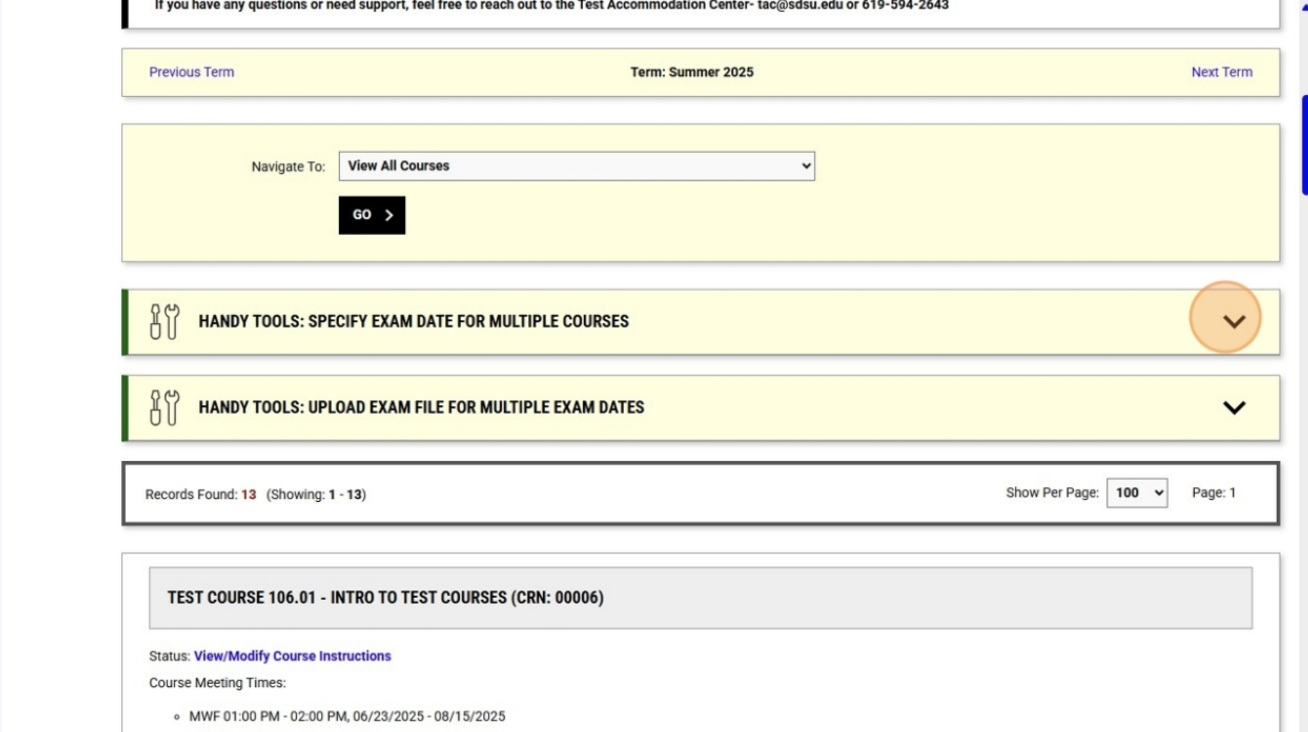
29. Select the classes to which you want to add the same exam date and click "Continue with Selected". If you would like to add the same exam date to all your classes, simply click "Continue With All Courses". 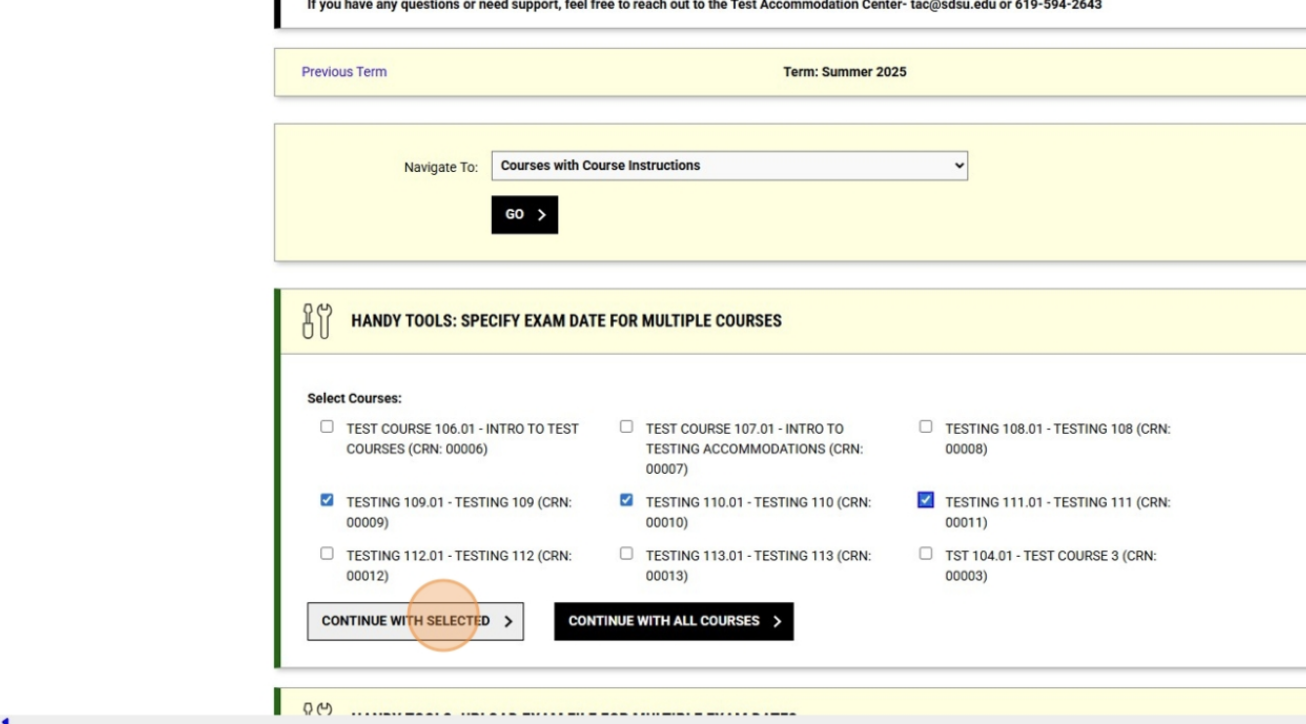
30. Enter all the exam details. Please note that using this method, the exam date, time, and duration will be identical for all classes selected. 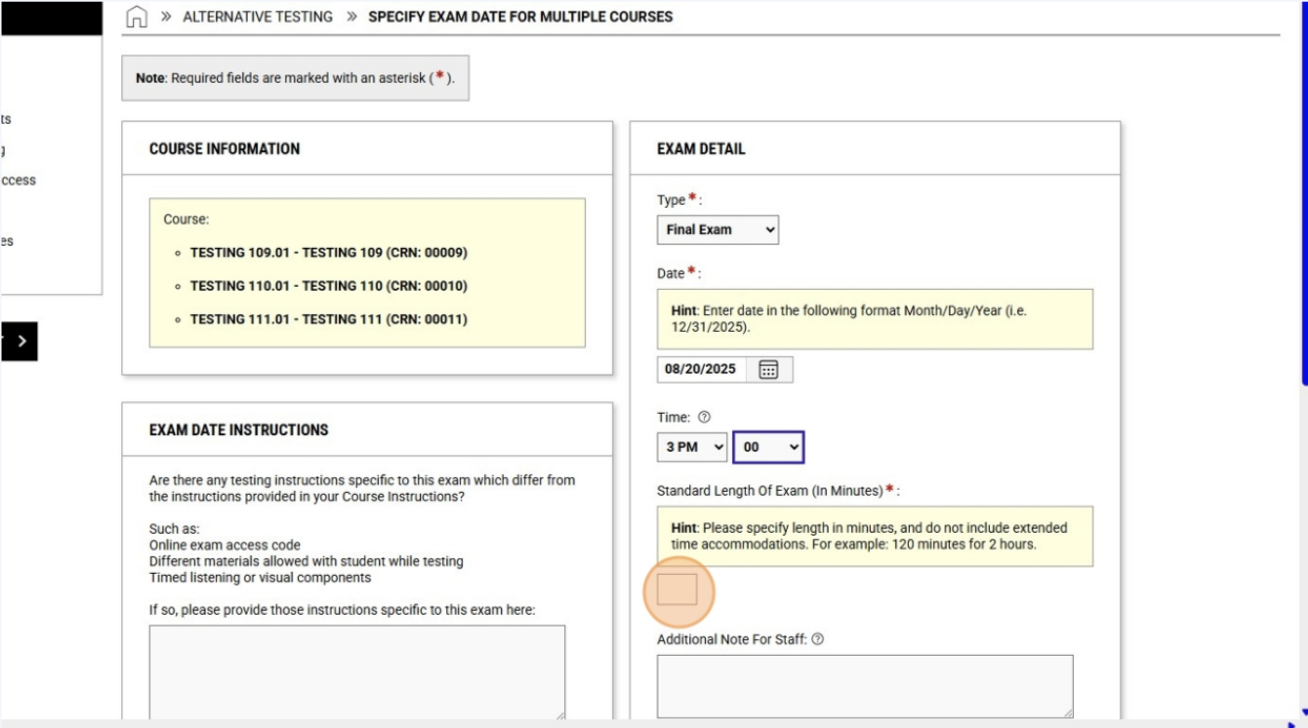
31. Type the name of your exam and upload the exam file. Finish by clicking "Save Exam Date". 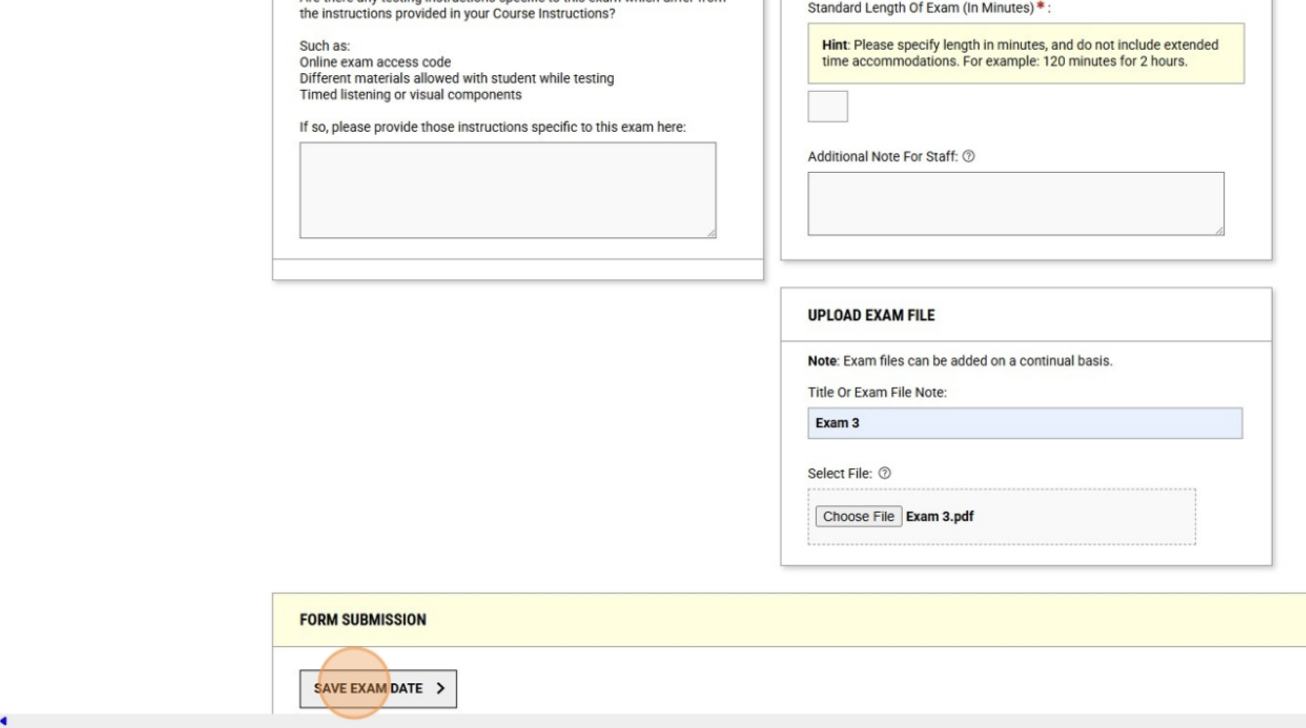
1. Navigate to your Alternative Testing home page by clicking "Alternative Testing". 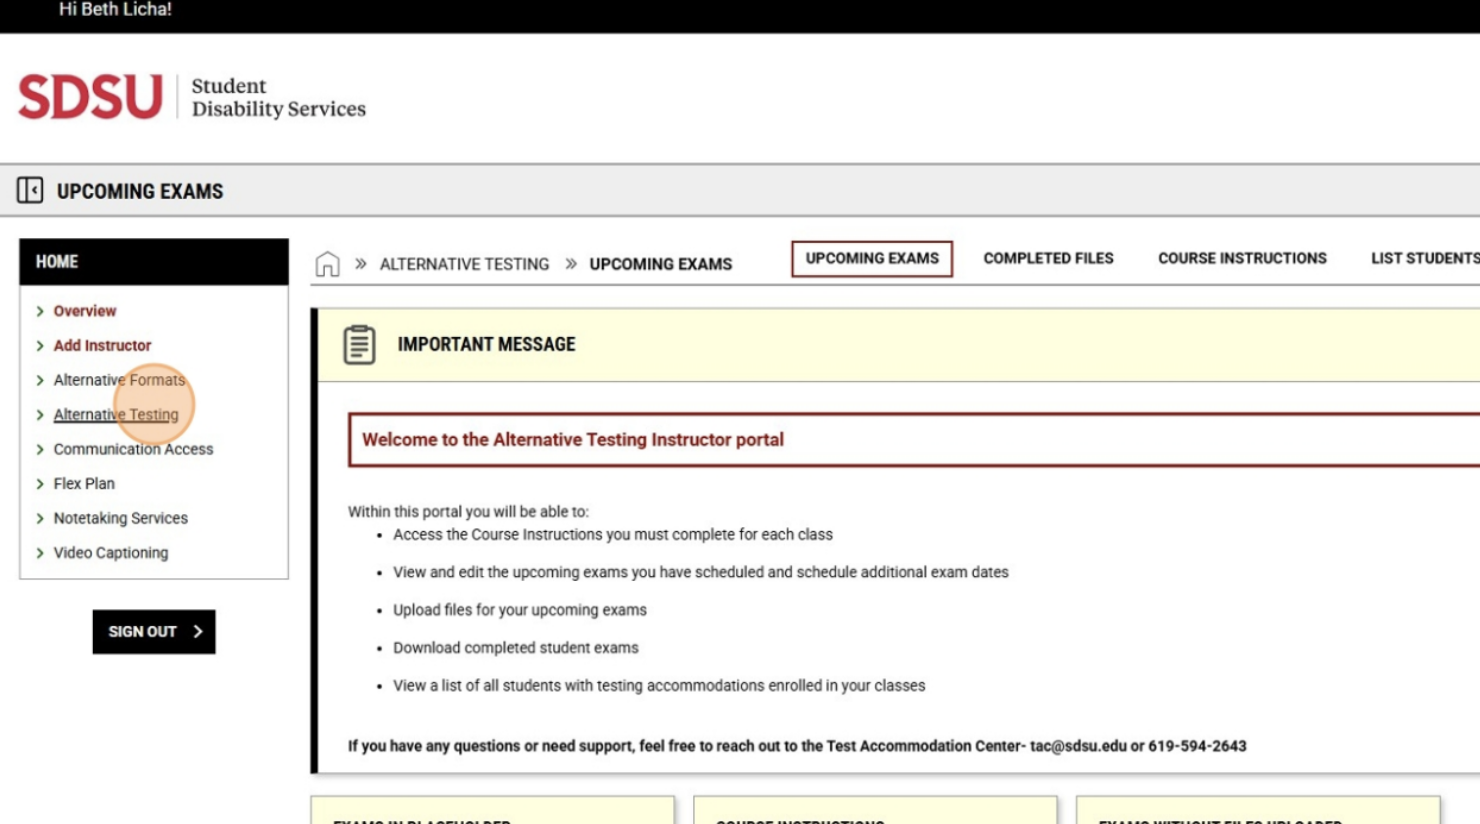
2. Uploading a New Exam: Select an exam from the list for which you have not yet uploaded your exam file. 
3. Type the title of the exam in the "Title or Exam File Note" field. 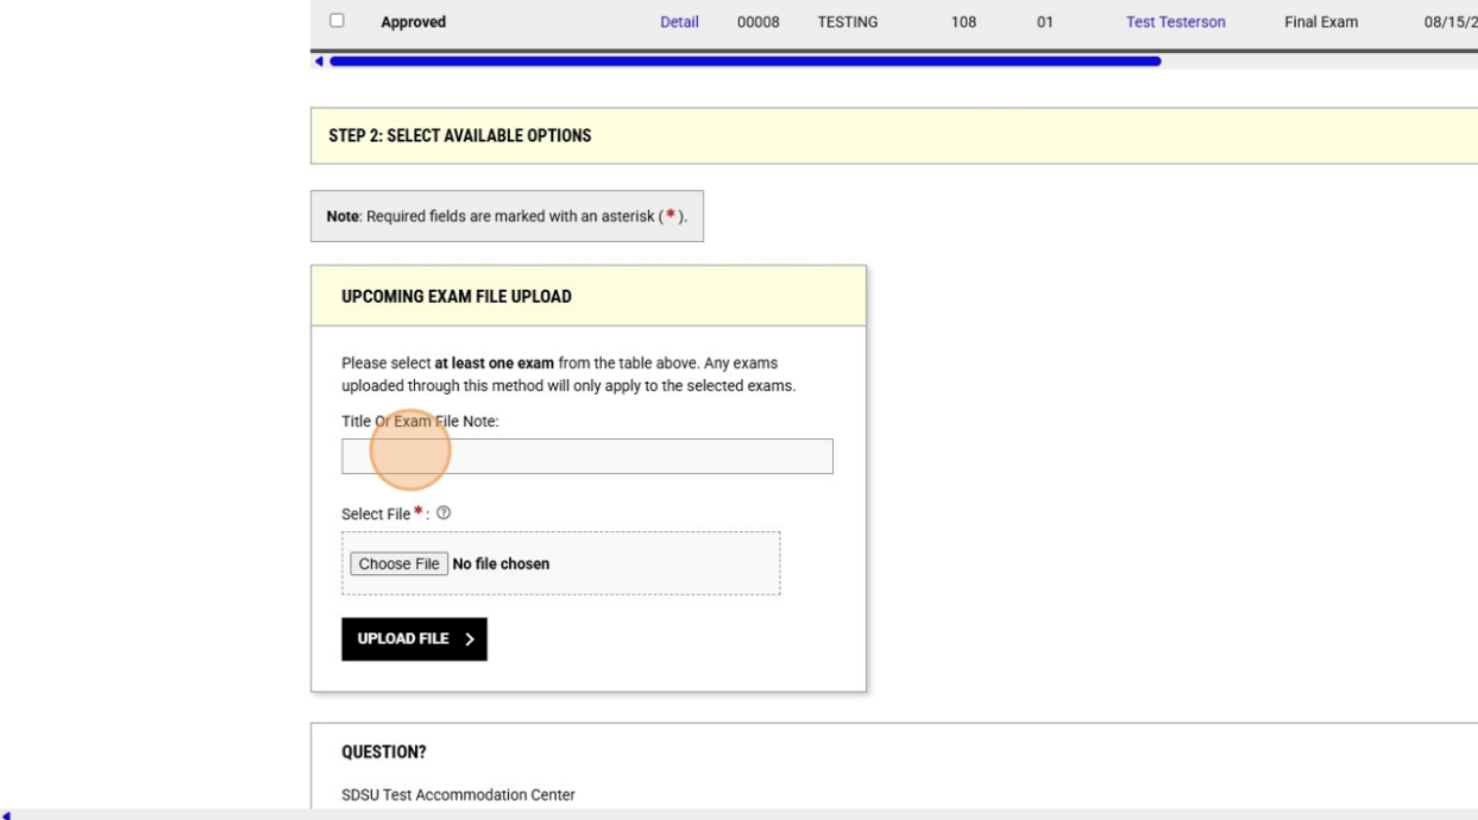
4. Click "Choose File", select the file from your computer, and click "Upload File". 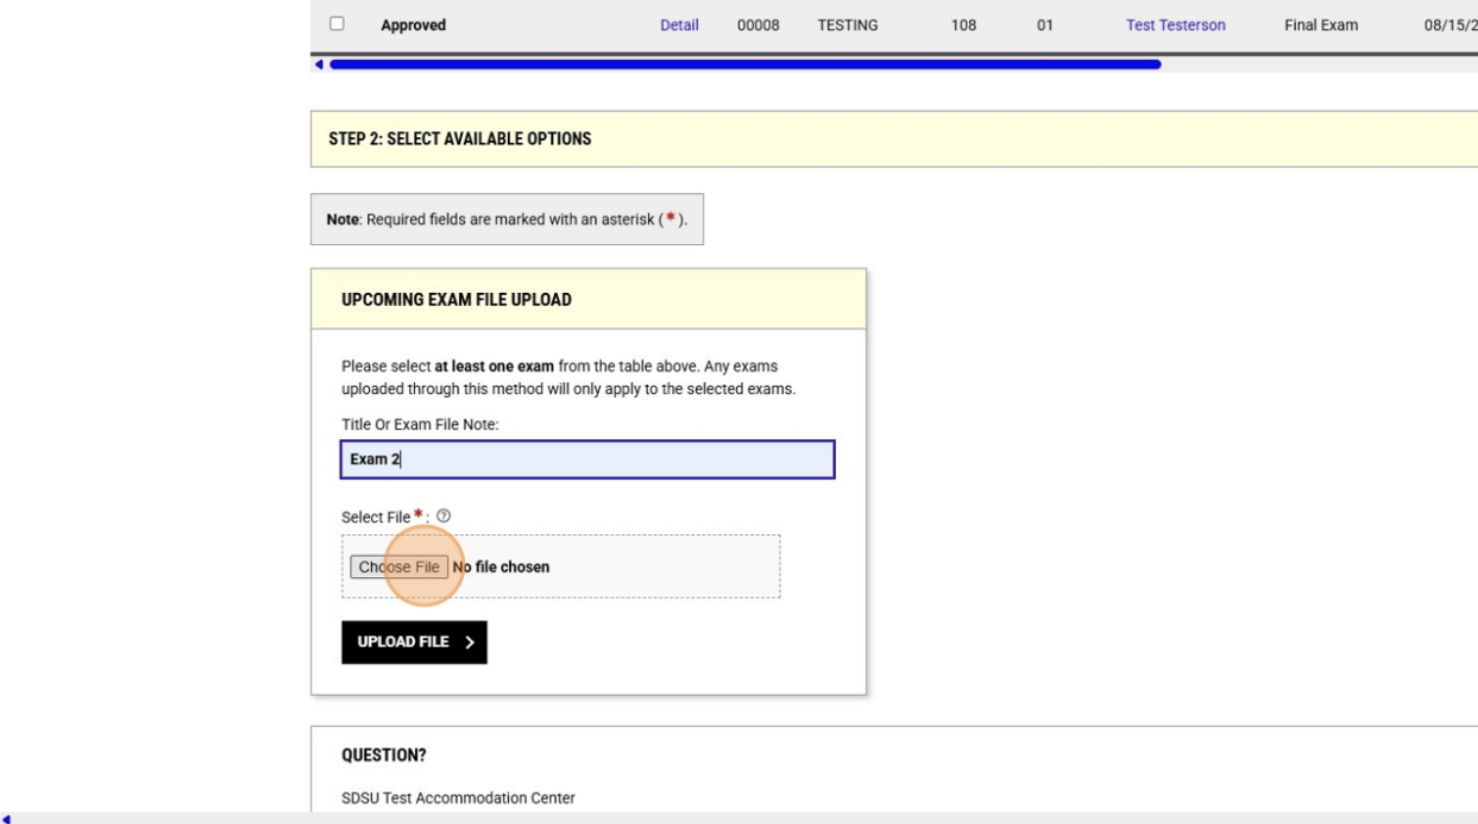
5. Uploading the Same Exam File for Multiple Exams: From your testing home page, click "Course Instructions". 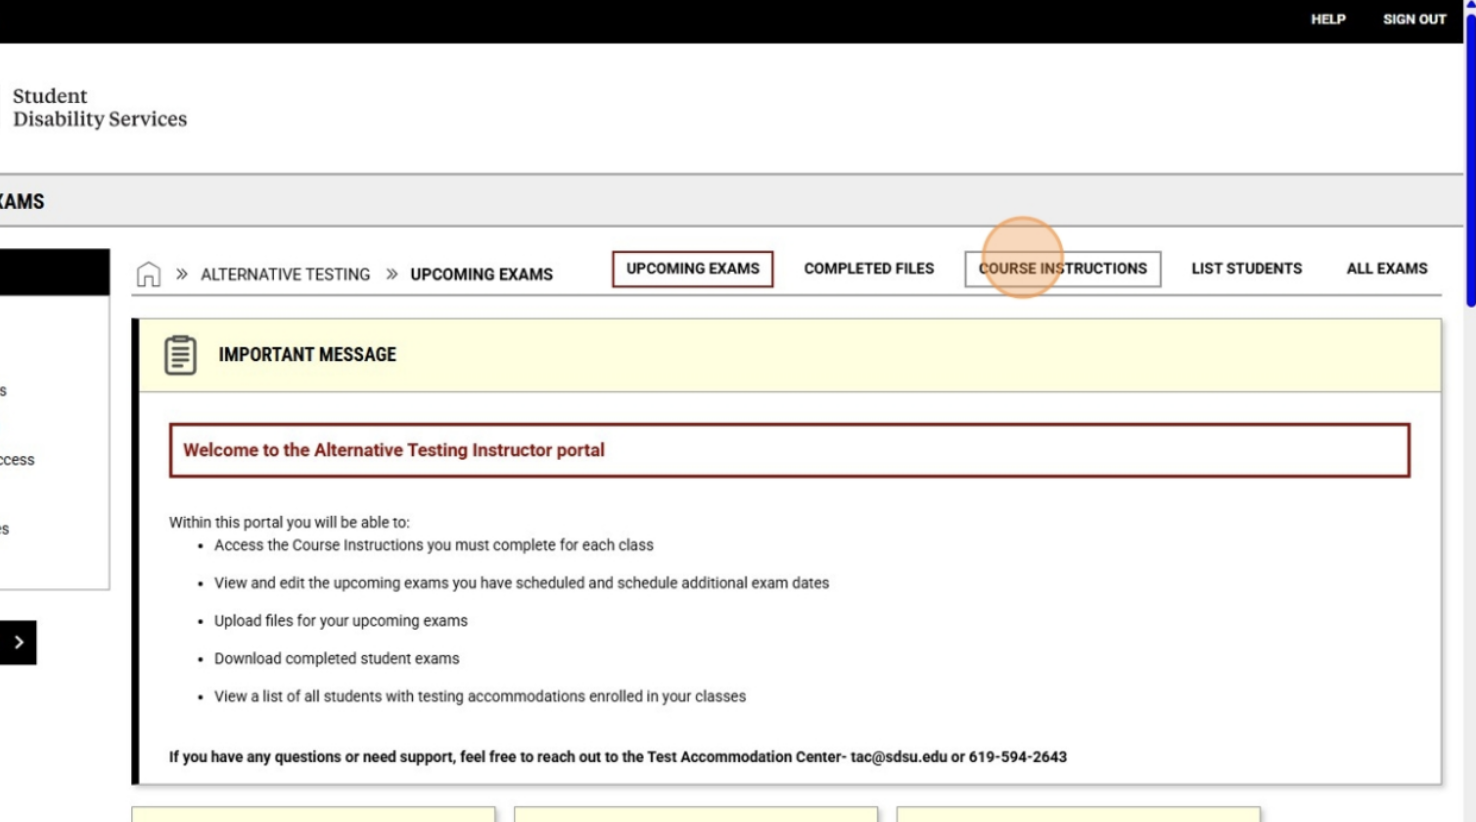
6. Click the "Handy Tools: Upload Exam File for Multiple Exam Dates" dropdown menu. 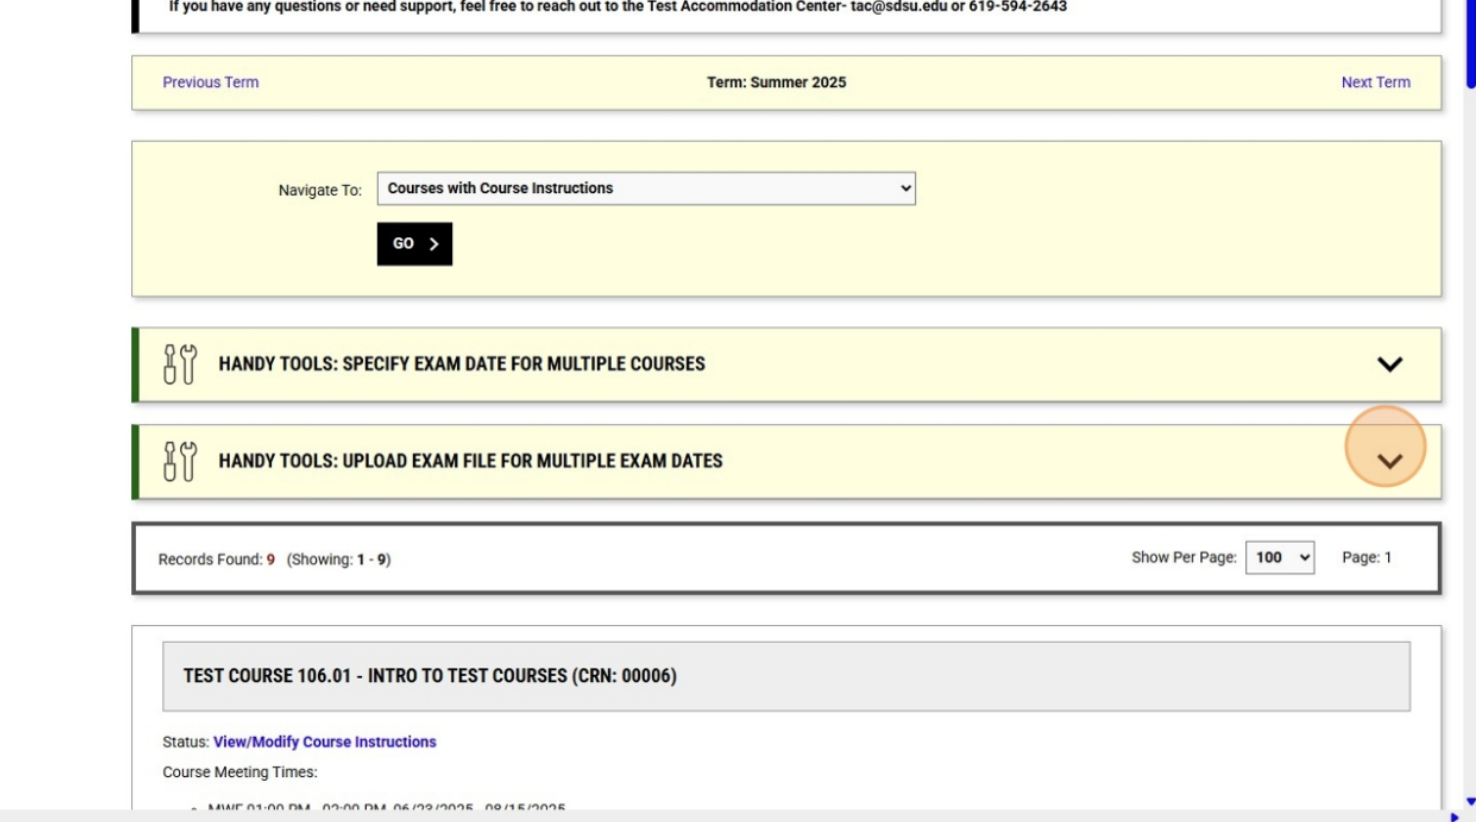
7. Select a date that is 7 days in advance of the scheduled exams and click "Find Exam Dates". 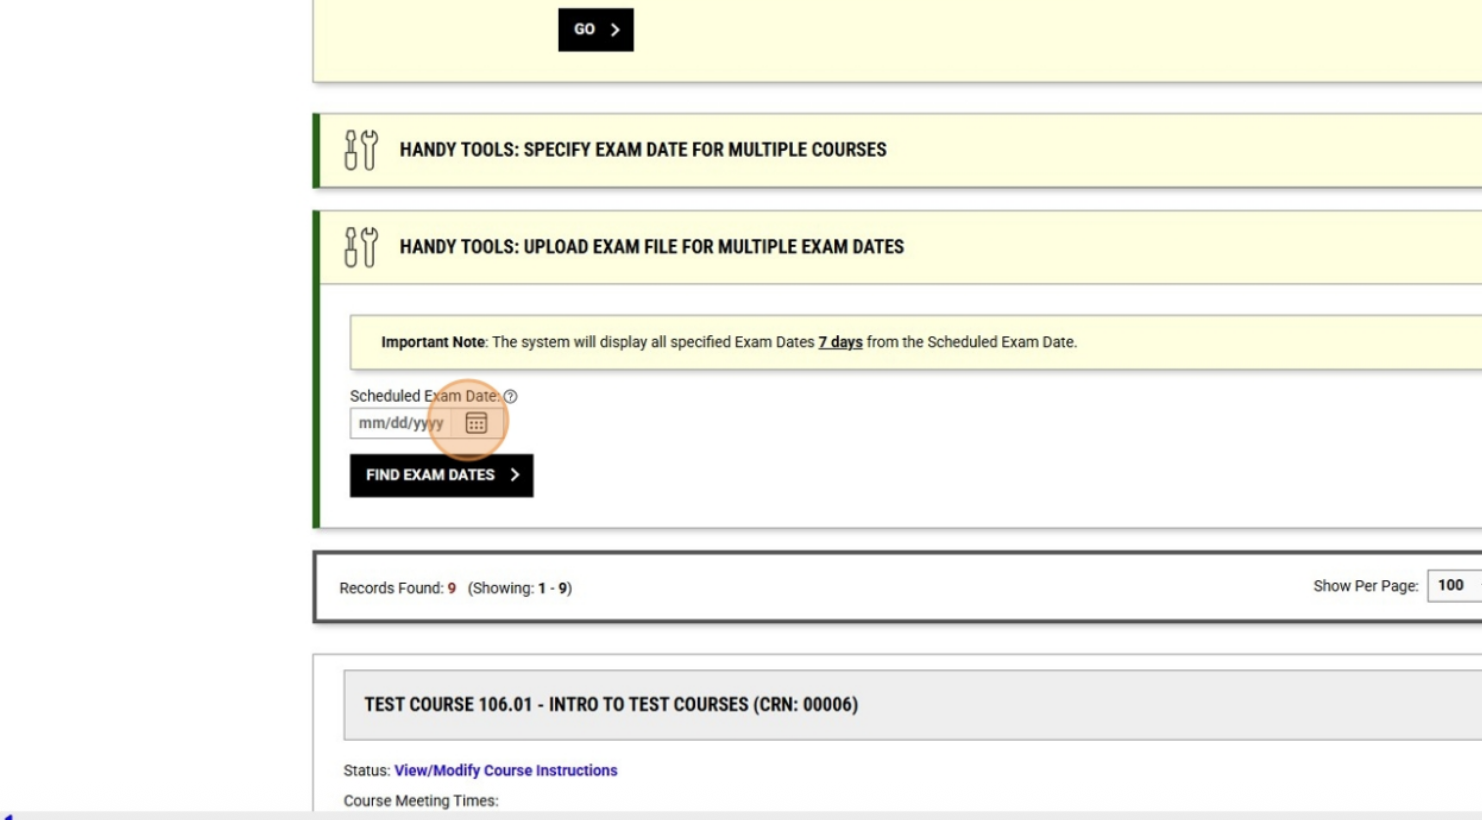
8. Select to which exam dates you would like this exam file applied. Type the name of your exam and upload the exam file. Click "Upload Exam". 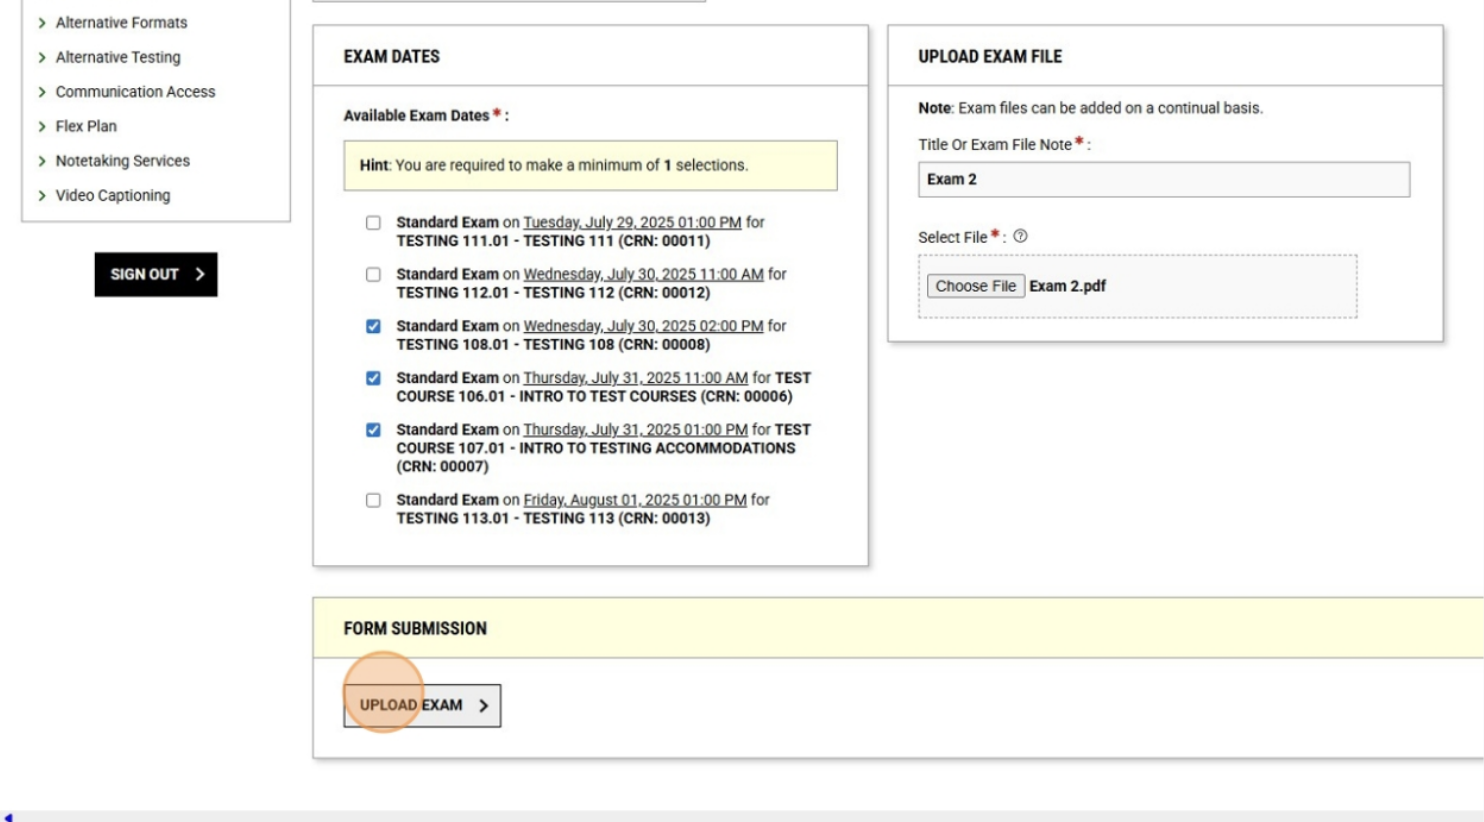
9. Downloading Completed Exams: Click "Completed Files". 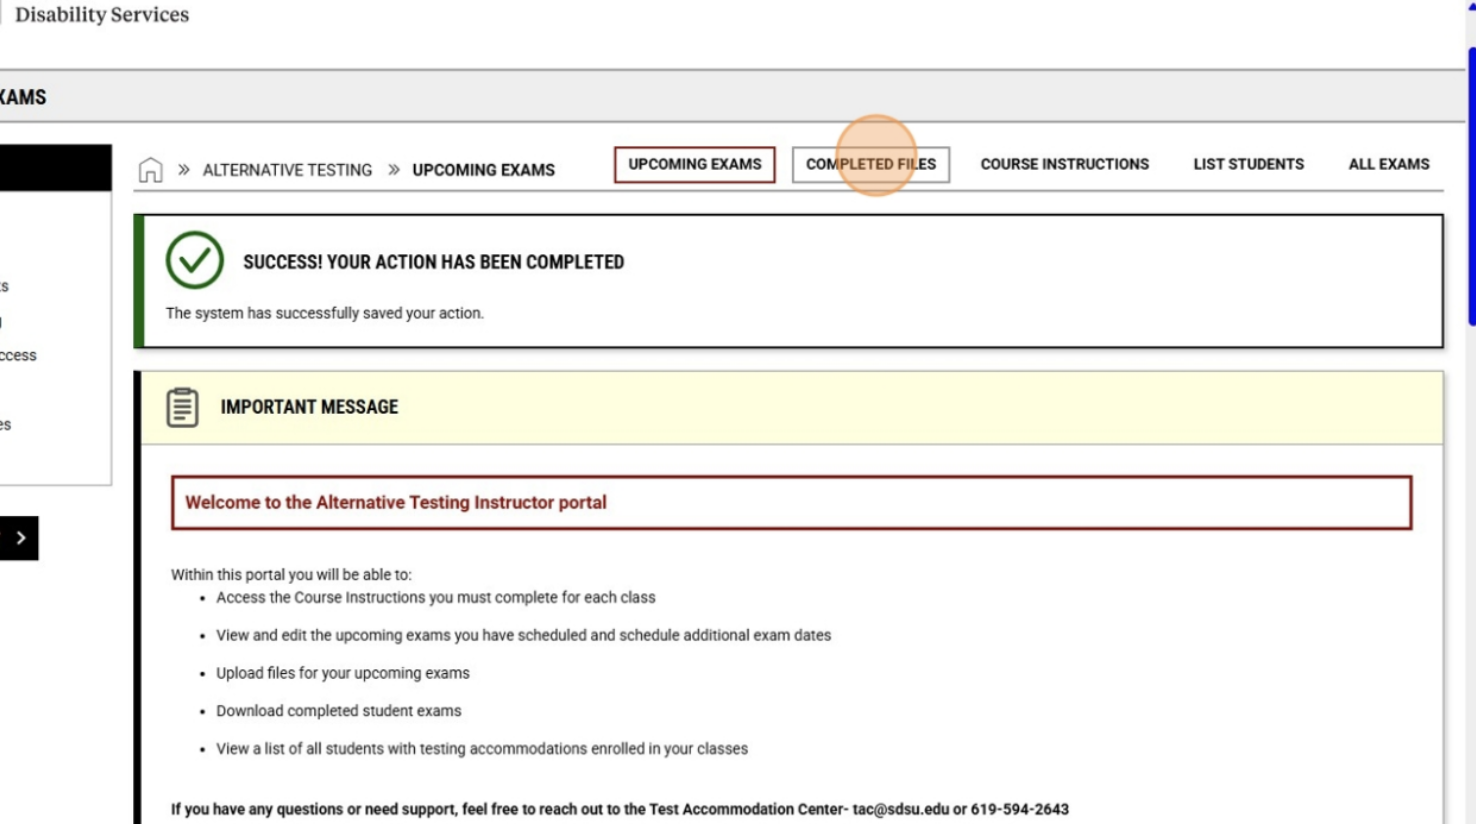
10. Identify the exam you would like to download and click "Download". 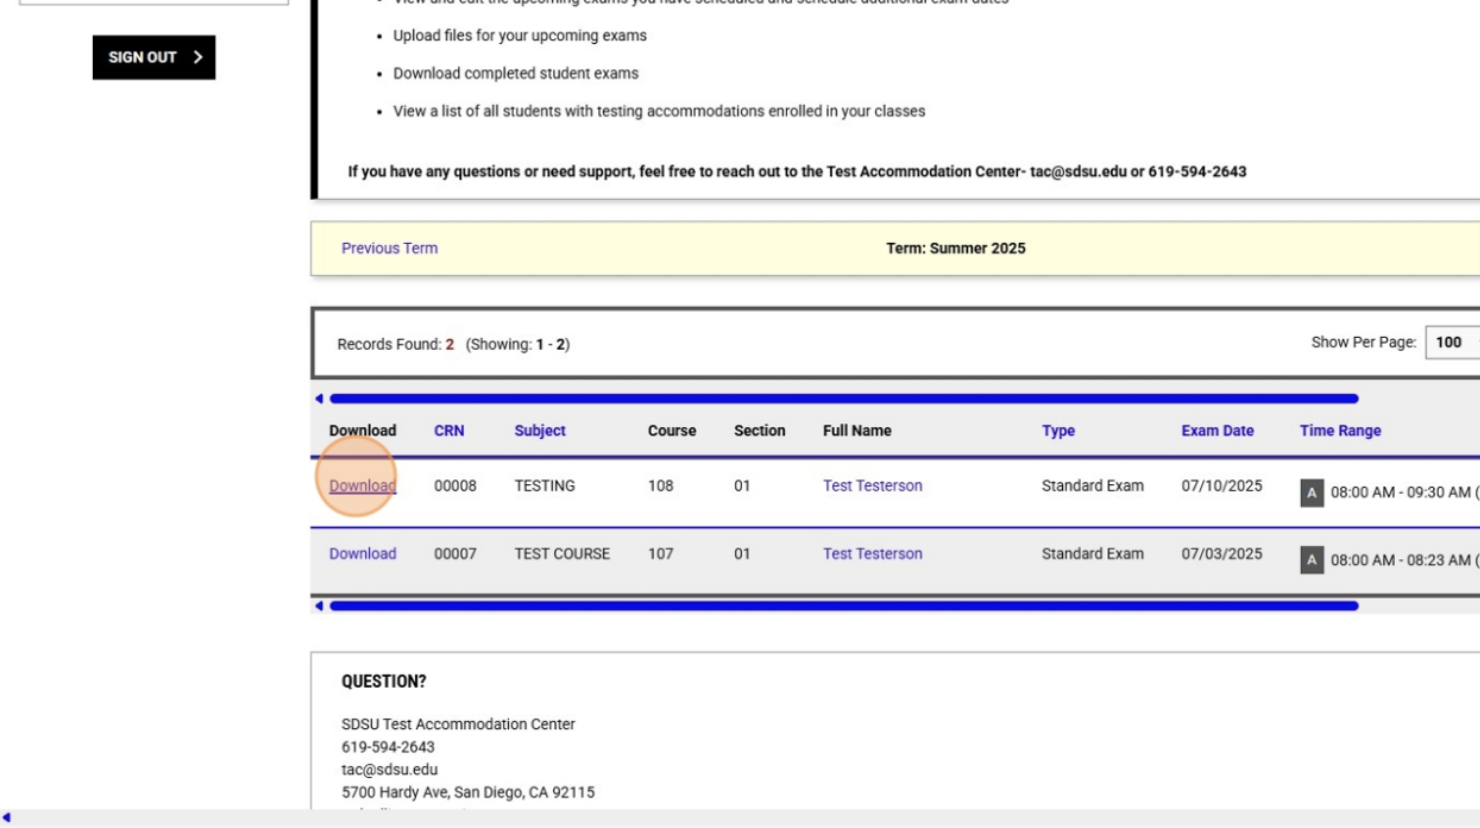
11. Where is the Exam?: The exam will now be in your computer's Downloads folder.
12. Note About the New Cover Page: Each exam will now have a cover page. That cover page was not only the instruction sheet we used during the proctoring of that exam, it was also the electronic communication tool our new system used to route that exam to your SDS Account. We cannot omit cover pages from exam uploads.
Q: I need to change the exam date for my exam.
A: Please contact the Test Accommodation Center (TAC) so we can work with you and ensure all of your students can be rescheduled to the new test date.
Q: My student has accommodations that I am unsure of how to apply to my exams. How do I navigate this situation?
A: Please contact the TAC at [email protected] as soon as possible. We can advise on trying to find a suitable solution that will work for all parties involved.
Note: If you are a student assistant (SA) or graduate assistant (GA), you should have been assigned a separate work email account. This will be the email address where SDS Connect will send emails to. Please contact our IT department to find how to access your work account.
If you require additional support or have any concerns or questions, please reach out to the Test Accommodation Center at [email protected].